James Muspratt
Jan 10
Welcome to Web 3
Happy New Year! Here’s the syllabus:
Happy New Year! Here’s the syllabus:

There’s a pretty great documentary on Charles and Ray Eames that you can watch for free online (Flash is required).
Recommended if you have any interest in graphic design, animation, filmmaking, painting, illustration, furniture design, or exhibition design.
CSS selectors are the part of CSS syntax that “target” or “select” an HTML element or elements to be styled. In pseudo-code, a CSS statement look like this:
selector {
	property: value; /* declaration 1 */
	property: value; /* declaration 2 */
}
Use a tag name by itself to target a particular HTML element:
p {font-family:helvetica, arial; font-size:12px; line-height:18px;}
h2 {color:gray;}
div {padding:20px;}
Use a comma to target multiple HTML elements with a single expression:
ol, ul {list-style:none;}
p, h2, h3 {margin-bottom:10px;}
Target any HTML element of a particular class:
.warning {color:red;} /* matches <p class="warning">, <ul class="warning">, etc */
.intro {font-size:14px; line-height:18px;}
.caps {font-size:90%; letter-spacing:1px;}
Target any HTML element of a particular ID (should only match one element per page at most, since IDs must be unique to the page):
#sidebar {float:right; width: 30%;}
Target a particular HTML element of a particular class:
p.warning {color:red;}
div#sidebar {float:right; width: 30%;}
Target a particular HTML that has multiple classes:
p.warning.intro {font-weight:bold;} /* matches <p class="warning intro"> and <p class="warning intro awesome"> but NOT <p class="warning">*/
Use descendency to target elements that appear inside of others:
#main p {font-size:12px; line-height:16px;}
#main ul {list-style:circle;}
#sidebar ul {list-style:disc;}
Combine these techniques to get more granular control over your elements:
#main p.warning {color:red;}
#sidebar p.warning {background-color:red; padding:2px; color:white;}
#sidebar p.warning.intro {background-color: orange;}
Use a colon to indicate pseudo-classes. Here are the most common:
a:hover		{border-color:red;} /* invoked on mouse-over */
a:active	{border-color:orange;} /* invoked during mouse-down */
input:focus {background-color:yellow;} /* invoked while cursor is in the field */
li:first-child {margin-left:0;} /* targets the first list item in a set of list items */
Use the attribute selector to target elements of a particular attribute:
img[alt] {border-color:red; } /* matches all images that HAVE an alt attribute */
input[type="text"] {padding:2px;} /* matches all inputs whose type is "text" */

I'm really interested in this idea of designing sites that are controlled using API's. I found this article really interesting. What do you guys think?
Would it be possible to add comments to students posts? Maybe it could help us communicate and learn from each other.
Your task is to mark up the attached text in HTML, then style your markup to match the enclosed screenshot.
You may only add one ID and one class to the markup!
Related to the box model is the distinction between block-level elements and inline elements.
Block-level elements (e.g. p, h1 through h6, ul, li) take up their own horizontal line and expand to fill the space available to them. For example, if you have a short heading (like <h3>My Skills</h3>) and apply a border-bottom to it, that border will extend well past the end of the word and won’t stop until it hits the edge of the containing element (your div or article or whatever).
Inline elements (e.g. a, img, span, strong, em, input) are part of the natural flow of running text and don’t take up their own lines by default (think of how you can wrap a phrase with the <strong> tag and it won’t push anything to the next line). These elements also don’t always respond to margin and padding as you might expect.
Now for the important part: you can change the behavior of any element using the display property.
Use display: block; to force an inline element to behave like a block-level element:
nav li a {display:block;} /* force the clickable link to expand to the full width of the list item */
Use display: inline; to force a block-level element to behave like an inline element:
nav ul li {display:inline;} /* force the li's to sit on the same line as each other */
There’s one more option: display:inline-block forces an element to acquire a sort of mixture of the two properties: the element will be inline in the sense that it will follow the flow of running text and sit side by side with adjacent content (also, borders will surround only the text itself, not the whole link). But it will be block in the way it reacts to width, height, margin, and padding:
nav li a {display:inline-block; border:1px solid blue; padding:3px; margin-right:20px;} /* put nav items in a row but allow block-like properties to be applied */
Keep in mind that display:inline-block has weak support in IE7 and lower.
Let’s review some of the most common CSS properties and their shorthand versions.
Fonts should be specified as a “stack” of multiple fonts: this provides fallbacks if the first font is not available to the user. Make sure to put quotation marks (single or double) around multi-word font names, and to end the font stack with an appropriate generic keyword (serif, sans-serif, monospace). If you put the page’s primary font on the body tag, nested elements like paragraphs, lists, etc. will inherit the font without you having to specific it again:
body {font-family:"Helvetica Neue", helvetica, arial, sans-serif;}
body blockquote {font-family:georgia, "Times New Roman", times, serif;}
body code {font-family: monospace;} /* code samples on this site use this rule along with background-color:yellow; */
Set type size and leading:
body p {font-size:12px; line-height:15px;}
You’re welcome to use the shorthand font property, but it’s fairly picky about the minimum properties:
body p {font: 12px georgia, "Times New Roman", times, serif; } /* "font size font-family" is the fewest properties you can declare with the font shorthand; otherwise the whole line gets ignored */
We probably also want to specify a line-height; to do that, use a slash after the font-size and put your line-height there:
body p {font: 12px/15px georgia, "Times New Roman", times, serif;}
If you want to add all the other possible options, they need to come before the mandatory settings:
body p {font: italic small-caps bold 12px/15px georgia, "Times New Roman", times, serif; } /* all the fixins: font-style, font-variant, font-weight, font-size, line-height, font-family */
Some other typographic properties:
p em {font-style:italic;} /* a little redundant: browsers tend to italicize the emphasis tag by themselves */
p strong {font-weight:bold;} /* a little redundant: browsers tend to bold the strong tag by themselves */
span.caps {text-transform:uppercase; letter-spacing:1px; } /* better method for small-caps than using font-variant:small-caps */
Don’t forget you can use the normal value to override previous bold/italic settings (or the defaults):
p strong {font-weigh:normal; color:red;} /* in this design a color change stands in for bold */
Realign the text of an element (only works on block-level elements):
h2 {text-align: center;}
p.caption {text-align:right;}
Indent the first line of an element:
article p {text-indent:20px; margin:0;} /* NB: In classical book typography, you would not also add margins between paragraphs; text-indent is enough to signal a new paragraph. */
A large negative text-indent is often used to hide the text of an element while still applying other properties to it (which can’t be done using display:none;). This is the basis of the classic “image replacement” technique, where text content is hidden and replaced with a (background) image:
h1#logo {text-indent:-9999px; background: white url(logo.png) no-repeat 0 0; width:200px; height:100px; }
The box model can be confusing, but it comes down to two fundamental ideas. First, margin creates space between elements, while padding creates space inside elements. The difference is a lot more obvious when an element has a background, a border, or both.
You can specify the values on particular sides individually:
div#sidebar {margin-top:20px; margin-bottom: 10px; padding-top:20px; padding-bottom: 10px;}
Or use the margin and padding shorthands. Use an analog clock as a reminder of the order (top right bottom left)
div#sidebar {margin: 20px 10px 5px 7px;} /* margins-top: 20px, margin-right:10px, margin-bottom:5px, margin-left: 7px */
The other shorthands:
div#sidebar {margin:20px 10px;} /* margin-top AND margin-bottom are 20px, margin-left AND margin-right are 10px */
div#sidebar {margin:12px 7px 8px;} /* margin-top is 12px, margin-left AND margin-right are 7px, margin-bottom is 8px; */
So here’s how we would apply a gray background to blockquotes, inset the type inside that gray box by 5px, and then inset the whole thing by 20px on either side from its container’s edges:
blockquote {margin: 0 20px 0 20px; padding:5px; background-color:gray;}
The second big idea behind the box model: margin and padding both get added to any width and height settings you have specified, which is a little unintuitive.
div#sidebar {width:200px; padding:20px; margin:20px 10px; }/* takes up 260px of horizontal space */
nav  {height:50px; padding:10px 20px; margin-bottom:20px; }/* takes up 90px of vertical space */
Unordered lists (ul) and ordered lists (ol) both have list items (<li>) nested inside them. By default, browsers add bullets to unordered lists and sequential numbers to ordered lists.
Traditionally the ul has been used for all sorts of text content that needs to be grouped together but doesn’t involve running text (as in a paragraph). A set of navigation links are the most common example, and we can use CSS to style them any way we want. (NB: list-style is technically shorthand for list-style-type, list-style-position, and list-style-image, but it’s rare to need those three properties on their own).
nav ul {list-style:none; } /* remove bullets *
#main ul {list-style:disc; } /* change bullet style from solid circle to disc */
Borders are useful both to create visual boxes and also to create horizontal or vertical lines. Here’s we put borders on all four sides of the element:
div#sidebar {border-width: 2px; border-color:gray; border-style: solid;}
The shorthand below is useful, especially when applying a border to just one side (border-top, border-right, etc.). Remember to always use the sequence border-weight, border-style, border-color:
div.sidebar {border: 5px solid gray;} /* put a border around the whole sidebar */
div.sidebar a {border-bottom: 1px dotted blue;} /* underline links inside the sidebar */
When applying background colors, it’s simplest to use the background-color property on its own
div#sidebar {background-color:gray;}
But when applying a background image, I recommend the background shorthand. Include all these elements and don’t change the order: background-color, background-image, background-repeat, background-attachment, background-position. Note that transparent is a legitimate and useful value for background-color. background-position requires horizontal and vertical values (e.g. 2px 5px, left top, center center, 30% 50%, etc. And finally, background-attachment can be scroll (the default) or fixed.
section#main {background: transparent url(images/pattern.png) repeat-x left top;}
Here are Big Ideas slides (PDF) from our first class.
I gave two examples of websites that combine visual ideas with smart structuring and programming:

The Walker Art Center in Minneapolis launched a new site last Fall that acts as a fairly expansive platform for art news, criticism, and conversations in addition to listing the usual exhibition info.

Ian Coyle’s Field Notes microsite is a sort of behind-the-scenes into particular projects in his portfolio. A great example of carefully crafted design that departs from the standard “fixed width column in the middle of the page” format.
As with Exercise 1, your mission is to view the enclosed screenshot, then use appropriate HTML markup and CSS to match it as closely as possible. You are allowed one class and no IDs. No floats and no position:absolute or position:relative!
Be sure to refer to the CSS Properties and Inline vs. Block cheat sheets if you need to.
Just wanted to re-post the description and requirements for project 1.
Create a blog, entirely controlled by Wordpress, that serves as an online notebook of and about your design process.
You should design and structure the blog to accept multiple kinds of content: samples of your work in progress, others’ design/artwork that inspires you, questions about design or code, web bookmarks, etc.
The success of this project depends both on the design of your blog and the content you add to it. While blogs are by their nature templated, you should not treat yours as a generic container: its design should express an idea or emphasis that is important to your work and methods. Take advantage of native Wordpress features like categories, tag, and pages to highlight difference and variation in your posts.
March 21, 2012 (Preliminary Grade: structure must be complete)
May 2, 2012 (Final Grade)
Here are a few examples of blog sites that are either particularly well-crafted or are doing something interesting with structure. Be sure to explore the various page types: home page, “permalink” page, archive page, etc.
I thought this was interesting. It's not very in depth, but it did show me a few neat little tricks with .htaccess. It's worth a glance.
Found this interesting video tutorial linked from nettuts. It's mostly CSS and HTML with a little javascript/jQuery. It's a good little exercise and pretty informative. It wasn't difficult to understand anything he was talking about. It has to do with creating an iframe to dynamic add CSS and HTML in the browser.
One thing that may be even more useful is to check out this livereload.js. It's a mac app. that automatically reloads everything you do with the CSS and HTML. So, you can have a window open with the page you're working on and another with a text editor and you don't have to keep moving around reloading the page to see the changes. Pretty cool!
Also worth noting the use of the HTML5 attribute contenteditable and the CSS webkit property box-sizing.
Ok, here’s the bare-bones Wordpress theme you’ll be working from.
Plugins > Add NewUpload and then Choose File and navigate to the zip on your desktopAnd here’s a “map” of the way the primary templates use includes:

After you’ve done this exercise you may want to take a look at Max Design’s CSS Layouts for more examples and techniques.
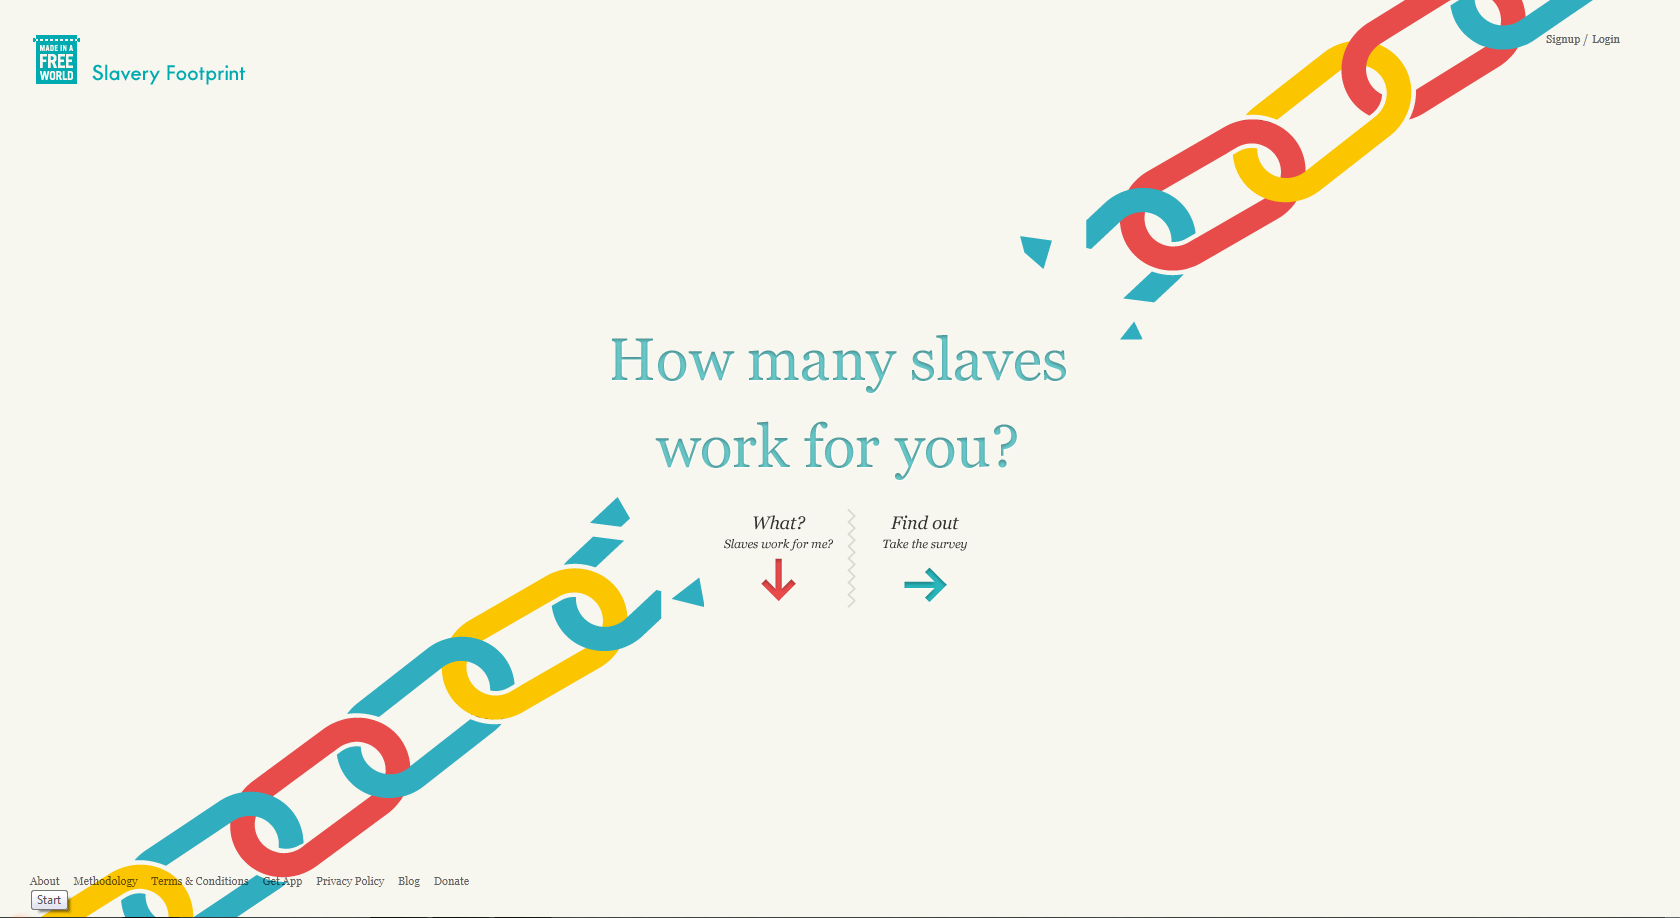
I thought this site was pretty interesting both in design and in content. Powered by HTML5 and lots of Javascript. I thought it was an intriguing way to present a survey. I liked how it gave you little bits of information along the way. I also thought it had a very nice visual element with the design.

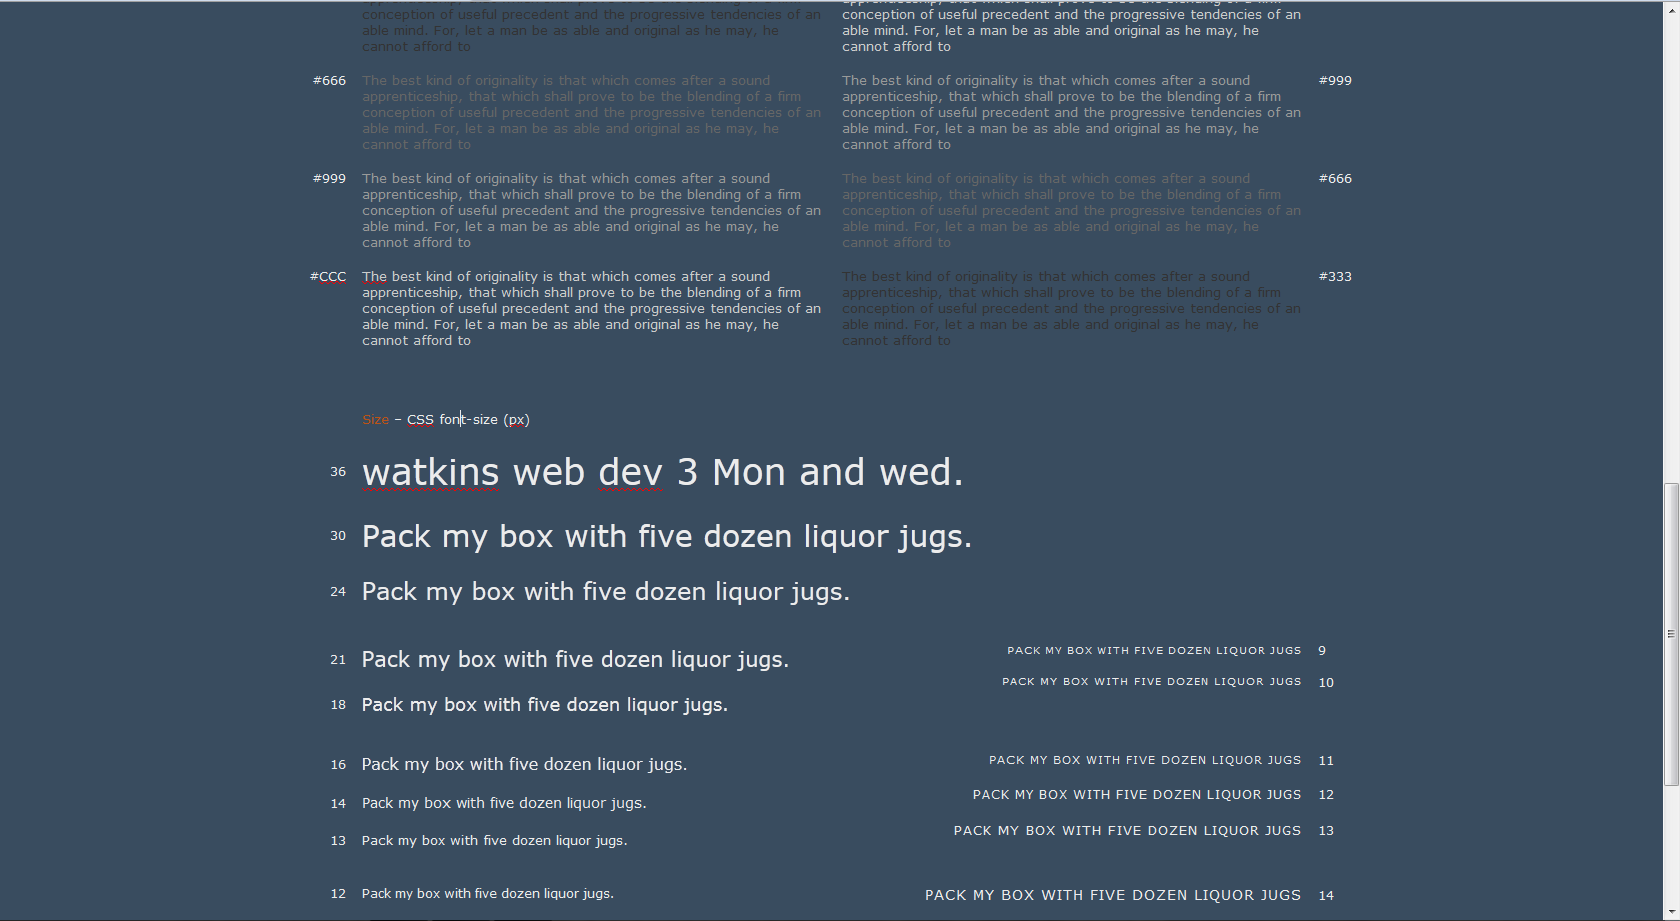
I came across this site and thought it was a kinda neat. It uses HTML5 and I'm not sure if the editable content uses the new contenteditable or not. It may use some Javascript or something. I guess it is a bit useless, but the idea is interesting. The demo did not work well in class.
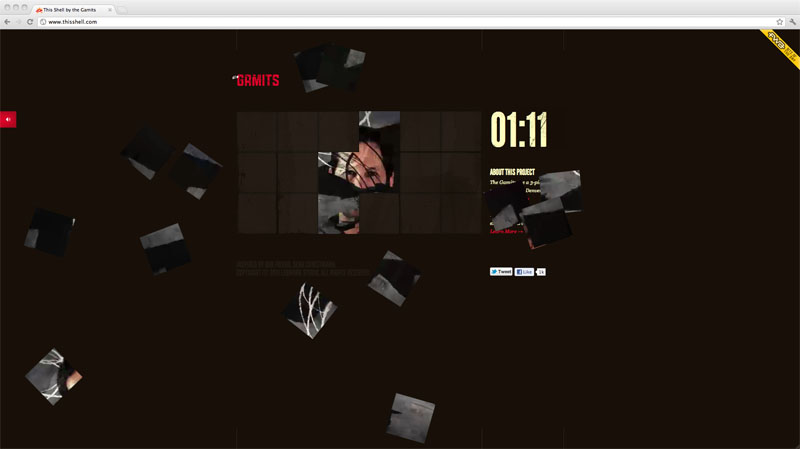
The Onion generally makes me laugh. I really liked the approached to this site. I like how the interface is different from most websites. It's almost like a TV channel rather than a website. I like how it was just full screen video and the menu was hidden and very simple. Unlike the main Onion site.

Hi everyone,
To help keep things organized, I’ve made a new Google calendar with due dates, Show and Tell assignments, etc. You can still view everything in this site’s calendar page, but you may want also to subscribe to the Google version in google calendar or iCal. Try copying and pasting the link below.
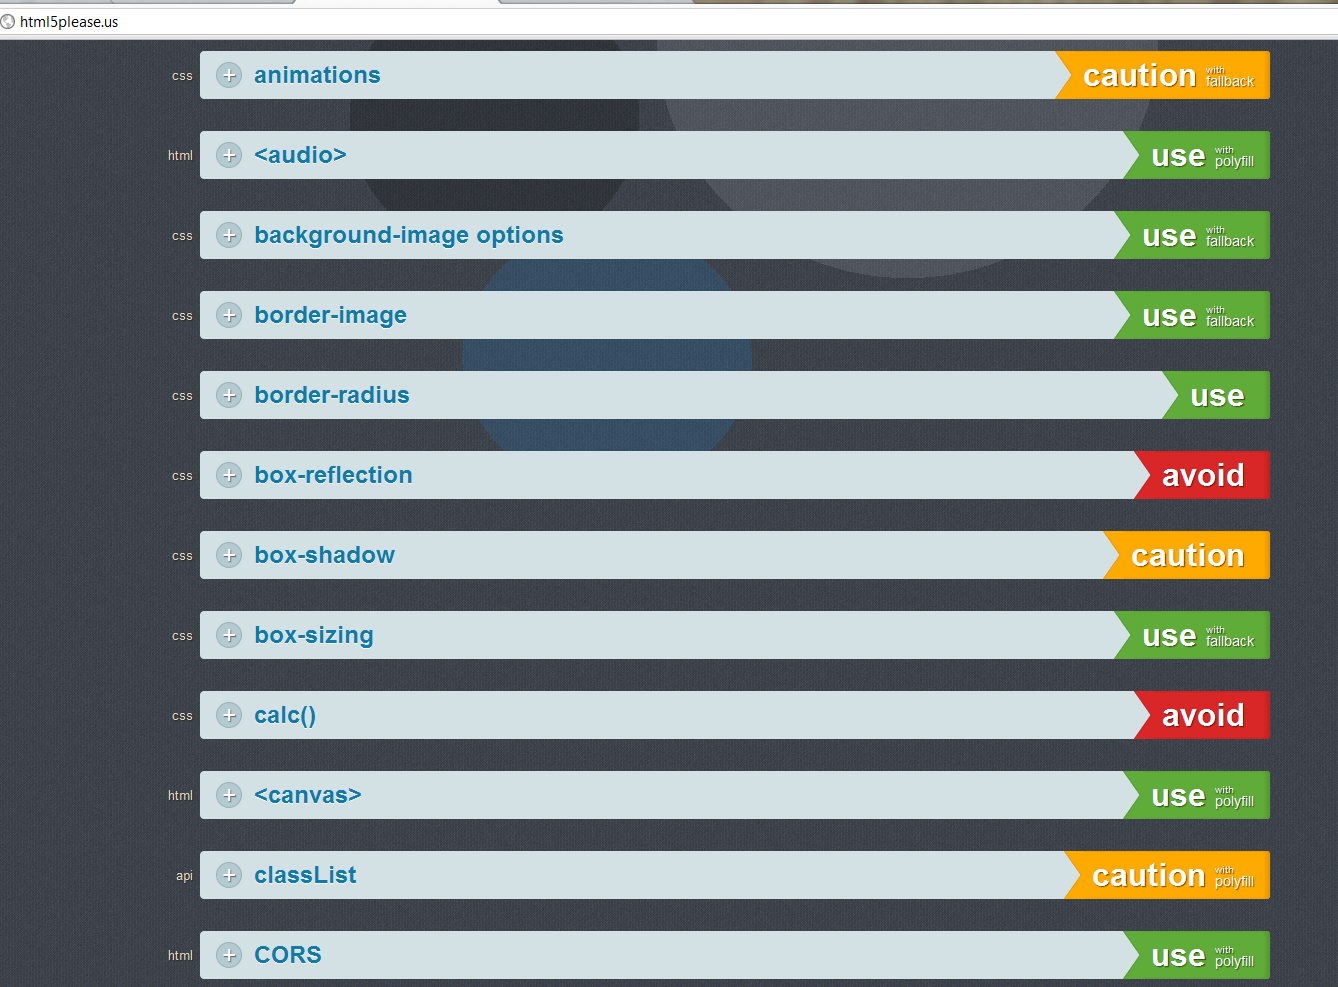
Found this somewhat interesting and somewhat useful site. You can look up new features of HTML5 and CSS3 and see if they are features that are supported by a number of browsers/devices. Should you be using them now? It tells you if it's okay, good with fallbacks or polyfills or whether you should avoid using such features right now. Just a quick little reference tool. It seems as though it's still pretty new. I'm sure they'll continue adding information.
The demos and exercises for this exercise are written as PHP comments in the files themselves. Start with index.php and then move on to index2.php, modifying the files and creating new ones as needed. Since PHP requires Apache to execute the code, you’ll need to upload them to your server space.
watkinswebdev.com server space; create a new folder called exercise5http://watkinswebdev.com/[username]/exercise5/ (remember, URLS that end in a slash (/) refer to directories, and index.php always gets loaded by default if it existsindex.php while viewing the output at http://watkinswebdev.com/[username]/exercise5/. When you need to change the file, edit in Textwrangler, save it, and upload it to your server space, overwriting the old version. Hit refresh in your browser to view the results.Note: for PHP exercises, “View Solution” will of course only show the rendered HTML output. Download the source files to see the PHP that makes it happen.

Ran across this article on A List Apart today and thought it quite interesting. It talks about responsive design and the problems around having a single large image that works for desktop uses, but scales down. Using too much bandwidth and slowing down the mobile version. It uses the example of the Boston Globe site that is quite interesting. Using the new HTML5 custom data attribute, which you can access via javascript. I thought it was really interesting. The methods they used did break. I think the new markup ideas for allowing multiple images sources is intriguing.
I suggest everyone interested in learning jQuery sign up for this as soon as possible. Every day for 30 days he will send you a 10-15 minute video teaching you jQuery. It sounds promising and I've been learning a lot from the Net Tuts site. This series you have to sign up and you will get the video lessons sent to your e-mail address.
Learn jQuery in 30 Days (Video Tutorials)
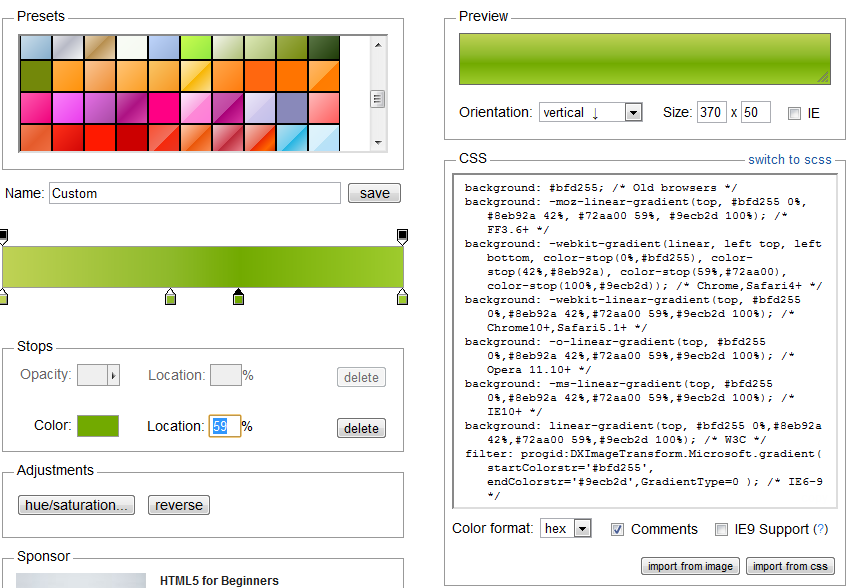
Here's another quick link. This is a tool that allows you to make gradients (like you would in Adobe Illustrator) and it gives you the CSS code for all browsers. If any one is interested in using CSS gradients.
This is a video blog by Marco Rosella. He’s an Italian interactive designer. This contains his favorite Vimeo and Youtube posts. The site is written in HTML5 with SVG animations. You are able to switch between the 2 video sources. The wheels are styled. You can see the code by searching the CSS.
You may stay updated through his social media sites.

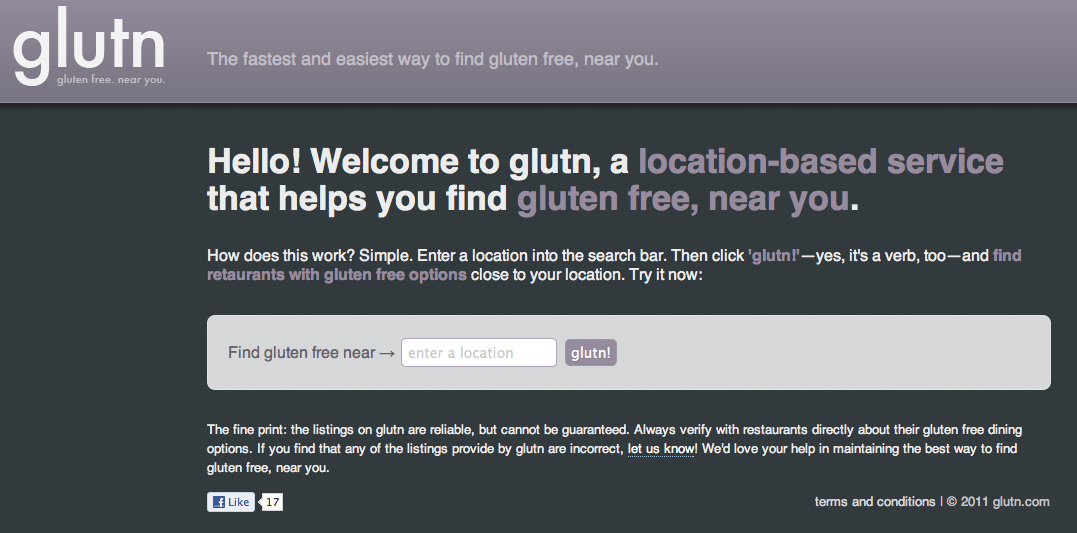
This site is written in html5. It s an app to help people with celiac disease find restaurants with gluten free menus. One may search by a zip code or based on current location.
This is an experimental site written with HTML5 and using WebGL. The site runs on the Chrome browser. It does not run on Safari.
It is an interactive simulation through a landscape. It reacts to where you look. After one finishes, they may look at the technology, add their own image to the story or see others creations.
Kelsey had showed a similar site last semester involving a jog through anywhere and having it adapt google map info and images to the video.

For those of you looking to sign up for your own personal domain and web hosting, take a look at this post from Web 1 for info and recommendations. The only thing I would add is I have heard good things about Webfaction, which has a $9.50/month plan.
Quick reminder: your sketches/wireframes for Project 1 are due Monday, February 6. A good place to start would be sketching the design of the home page, a single post (aka permalink) page, and the complete archive page. And you should have some sample descriptions or images that represent the kind of content you will be posting.
We’ve been doing a lot of code exercises and review over the past few weeks, which will of course be necessary for you to build your site. But right now I’d encourage you to put all that aside and think more generally about structure and visual presentation.
Finally, remember that this semester is more about you taking the initiative to explore your own ideas with design and code than it is about completing a pre-defined set of tasks. PHP, HTML, CSS, and Javascript are the tools, not ends in themselves. So above all, choose an interest or set of interests that you will be most enthusiastic about translating into an online project.
Floats are a useful but tricky tool for altering what we call the “normal flow” of an HTML document. Remember the chief characteristics of normal flow: elements marked up with inline HTML tags (a, strong, em, img) march across the screen as if they were running text, falling to the next line only when they run out of horizontal sapce, whereas block level elements (p, h1, h2, ul, table) start on a new line occupy their own horizontal space.
 The simplest use case for a float is for an image at the beginning of a paragraph. This paragraph shows the default, unfloated behavior: because images are inline by default, the image takes up space as if it were very large text at the beginning of the paragraph, leaving a large space to the right and above them.
In this paragraph I’ve used the same markup, but this time I targeted the image with CSS and applied float:left; as well as a small right margin: the image stays aligned to the left of the page but the paragraph now runs around it nicely.
Notice that this new paragraph also runs around the image. Note: this is the default behavior. Neither of the paragraphs (<p>s) are themselves floated — just the image. Now for some dummy text to finish out the paragraph: Lorem ipsum dolor sit amet, consectetur adipisicing elit, sed do eiusmod tempor incididunt ut labore et dolore magna aliqua.
Finally, here’s the same image at the beginning of the paragraph again, but with float:right; applied: the image goes as far as it can to the right until it hits the edge of the container, then allows content to flow around it. Now for some dummy text to finish out the paragraph: Lorem ipsum dolor sit amet, consectetur adipisicing elit, sed do eiusmod tempor incididunt ut labore et dolore magna aliqua.
Note: I tend to use right margins rather than left margins because I usually want the left edge of the first image (on each row) to align with its container.
Floats come in handy when you want to create a grid of images. Use CSS to target all the images and float them all left, giving each a small right and bottom margin to separate them slightly:
Floats can be applied to all sorts of elements besides images: paragraphs, list items, and of course the all-purpose block-level container <div>. When you have a design that requires column-like content areas, the technique known as “Opposing Floats” is often the most reliable. First, mark up your content however you wish and surround each content area with a div. You’ll probably want to give your divs classes or IDs (e.g. <div id="content"> and <div id="sidebar">). Now in CSS, set a width on the columns you will be floating, then float one left and the other right.
This div has been styled with width:20% and float:left;
This div has been styled with width:60% and float:right;. Lorem ipsum dolor sit amet, consectetur adipisicing elit, sed do eiusmod tempor incididunt ut labore et dolore magna aliqua.
The nice part about this technique is that you don’t have to explicitly set a margin to separate the two columns: since the floats are in opposite directions, they naturally leave a space as long as their total width adds up to less than the width of their container. In addition, you don’t need to know in advance which column will end up being taller: the parent container will expand to contain them both.
Because of the default way that floats force content to wrap around them (refer to the paragraph above that begins with “notice that this new paragraph…” above), it’s common for a gallery like the one above to mess up the positioning of the heading or paragraph that follows it. Often it appears the content after the floats has been “sucked up” into the floated content.
To fix this problem, there are two possible solutions. The first is to apply clear:both; to the element that you would like to force to begin on a new line. (You could also use clear:left; or clear:right; if you only want to clear one kind and not the other.) This works pretty reliably as long as you can easily target (with CSS) the content that follows the floats in the first place.
However, when content is being inserted dynamically or in different ways on different pages, it’s not always convenient to apply clear:both; — the CSS “hook” just isn’t always available.
So some clever people figured out a way to use a CSS3 selector (:after) to insert some dummy content, clear it, and then hide it from rendering on the page. It’s a hack known as clearfix, and it enables you to clear floats by styling the container of the floats rather than the content that follows it.
The style might look like this in your CSS:
#gallery:after {             /* use :after selector to insert content after the element */
        content: ".";        /* insert a period */
        display: block;      /* set it to be a block-level element */
        height: 0;           /* make sure it doesn't actually add space to the element */
        clear: both;         /* clear the inserted period */
        visibility: hidden;  /* make sure the period doesn't show up in the document */
	}
Because clearing floats is such a common task, you may end up filling your CSS file with dozens of statements that clear (or clearfix) this or that element. So many people choose to cheat a bit: in CSS we create classes with the names clear and clearfix and we insert these into our HTML wherever we need to clear some floats.
The CSS looks like this:
/* Float-clearing classes */
.clear   {clear:both;}
.clearfix:after   {content: "."; display: block; height: 0; clear: both; visibility: hidden;}
And in HTML:
[a bunch of stuff involving floats]
<h2 class="clear">The next section</h2>
or
<div class="clearfix">
	[a bunch of stuff involving floats]
 </div>
 <h2>This heading should be fine</h2>
Remember, clear:both; is for ensuring that something that comes after a bunch of floats doesn’t get pulled up into them. You apply it to the element that needs to be cleared. On the other hand, clearfix is intended for the container of floated elements, and ensures the elements that come after that container don’t get pulled up into them.
The position property is powerful but can be problematic when used incorrectly. If you’re just trying to create columns for your content or put an image over to one side, you should use CSS floats, not positioning.
But for certain situations, position:absolute, position:relative, and position:fixed are necessary. Here’s a rundown.
position:absoluteKeep in mind that the default state of HTML elements in “normal flow” is position:static;. “Static” is a bit of a deceptive word: it just means that the element naturally takes up space on the page and pushes other elements down (or to the side, if floated) by as much space as it occupies.
When you target an element in CSS and apply position:absolute, a few things happen:
top / bottom and left / right properties, in addition to margins and paddingNaturally, this makes position: absolute; useful for making some content overlap other content.
position: relativePosition:relative positions an element “relative” to where it would have been positioned statically. In other words, rather than add a margin-left:20px;, you could use position:relative; left: 20px;.
This is a contrived example, though, and we tend to use position:relative for a totally different purpose: By default, position:absolute’s coordinates are determined by the closest positioned container. This is usually the browser window itself (<body>). Since we often want to use a different container’s coordinates for absolute positioning, we can apply position:relative to the container of our choosing. Without a top or left value, this doesn’t do anything to the container itself. Instead, it allows us to apply position:absolute; to some nested element or elements and have our coordinates be relative to the container.
For example, some HTML:
<div id="main-column">
	<ul id="nav">
		[navigation links]
	</ul>
 </div>
And the CSS:
#main-column {
	width:500px;       /* set a width */
	margin:0 auto;     /* and center it on the page */
	position:relative; /* reset positioning coordinates for elements inside #main-column */
    }
#nav {
	position:absolute; /* remove from document flow */
	right:20px;        /* this means 20px from the right edge of #main-column */
	top:20px;          /* this means 20px from the top edge of #main-column */
   }
position:fixedLike position:absolute;, position:fixed; pulls the content out of normal document flow. In addition, it locks its position (defined by top / bottom and left / right) relative to the browser frame, so the element stays on screen even as the user scrolls.
If you need to apply position:fixed relative to a container, apply position:absolute; to the container first.
First, let’s go over three basic requirements for PHP code to be executed:
.php to be interpreted as PHP by the server.<?php ) and closing (?>) PHP tagsUpshot: if your browser is spitting out raw PHP code instead of executing that code, check the three above requirements.
In PHP, variables begin with a dollar sign ($) and can be used to store pieces of text (aka strings) as well as numbers. We store information in variables with a PHP statement that begins with the variable name and is followed by the equals sign (aka the “assignment operator”) and the value we wish to store. Note that strings need quotation marks around them, while numbers do not. Variable names cannot contain spaces, hyphens, or most punctuation characters besides the underscore (_). They also may not begin with a number.
<?php
	$my_name = "Joe Schmoe"; // a string needs quotation marks
	$my_age = 23;			// a number doesn't need quotation marks
	echo ("<p>My name is $my_name and my age is $my_age.</p>");
?>
When a browser requests our page, PHP will echo the string as HTML (the text in quotes above) but replace the variables with the values that have been stored i them:
<p>My name is Joe Schmoe and my age is 23.</p>
As we’ve explored in class, there are a variety of ways to combine, manipulate, and change variables. Remember that PHP is procedural and in many cases the sequence of your code matters:
<?php
	$my_name = "Joe"; // $my_name is now assigned the value "Joe"
	$my_name = "Fred"; // $my_name is now assigned the value "Fred" -- "Joe" is erased from memory
	$my_name = $my_name . " Shropshire"; // use concatenation operator (.) with a string to assign $my_name the value "Fred Shropshire".
 	$my_age = (5 * 30) - 100; // $my_age is now 50
?>
Arrays are also a kind of variable, but they are a bit more complex than scalar variables. If you think of a scalar variable as a text file, arrays are a spreadsheet: they store multiple “elements” in a sequence, and you can access particular elements separately.
Suppose you have some information about a user. Rather than store that information in m variables ($user_name, $user_age, $user_nickname), you could use an array to store all that information in the variable $user. Arrays have the following structure: each “element” (an item in the array) has both a key and a value. The key is essentially a name for the element: it identifies which one we’re dealing with, while the value is the contents of that element. For example:
<?php
    // create array elements and assign values
	$user[name] =  "Joseph Schmoe"; // element 1: key is the string "name", value is the string "Joseph Schmoe"
	$user[age] =  25;               // element 2: key is the string "age", value is the number 25
	$user[nickname] =  "Joe";       // element 3: key is the string "nickname", value is the string "Joe"
?>
You access and output the value of each element with the same syntax:
<?php
	echo ("<p>The user is named $user[name], is $user[age] years old, and is nicknamed $user[nickname].</p>");
?>
An indexed array is simply an array where the keys are numbers, starting with 0 and incrementing by one whenever an element is added. Indexed arrays are easier to manipulate programmatically (the array keys are fairly predictable), but of course the keys don’t carry much information about what value is stored in each element. They’re most often used for lists of content where the meaning of each element is obvious from the variable name:
<?php
	    // create array elements and assign values
		$site_users[0] =  "jschmoe";
		$site_users[1] =  "bsmith";
		$site_users[2] =  "ajones";
		$site_users[3] =  "cwilson";
?>
If you leave out the keys when assigning the value to an element, PHP will just create numeric keys for you, incrementing them as it goes. So this does exactly the same thing as the code above:
<?php
	    // create array elements and assign values
		$site_users[] =  "jschmoe"; // automatically gets array key 0
		$site_users[] =  "bsmith";  // automatically gets array key 1
		$site_users[] =  "ajones";  // automatically gets array key 2
		$site_users[] =  "cwilson"; // automatically gets array key 3
?>
We’ve already seen how PHP will replace any variable with its value. What’s tricky about arrays is that you can do this with the keys as well as the whole element:
<?php
		$attribute = "nickname";
		$user = "3";
		echo $user[nickname];      // outputs "Joe";
		echo $user[$attribute];    // also outputs "Joe", because $attribute = "nickname"
	    echo $site_users[3] ;      // outputs "ajones"
	    echo $site_users[$user] ;  // also outputs "ajones", because $user = 3
?>
Loops are probably the final fundamental programming concept we’ve covered. Here’s a quick review of the syntax for the three primary varieties:
while loops execute the code inside the curly braces repeatedly, and don’t stop until the “while condition” stops being true. The typical trick is to use a $counter variable that increments each time the loop is run. (The loop remembers variable values from the previous iteration of the loop, so eventually the while condition will stop being true and the loop will stop running.)
<?php
	$counter = 1;
	while ( $counter <= 6 ) {
		echo ("<p>Now the counter is at $counter.</p>");
		$counter = $counter + 1 ;
		}
?>
This will produce the following HTML:
	<p>Now the counter is at 1.</p>
	<p>Now the counter is at 2.</p>
	<p>Now the counter is at 3.</p>
	<p>Now the counter is at 4.</p>
	<p>Now the counter is at 5.</p>
	<p>Now the counter is at 6.</p>
for loops are similar to while loops but have slightly more elaborate setups. Rather than create and increment the $counter variable inside the loop alongside the code to be repeated, it all gets set up at the beginning. The setup is strict: you have to specify the starting value of the $counter variable, then the “while” condition, then the incrementing statement, all separated by semicolons.
<?php
	for ($counter = 0; $counter <= 6;  $counter = $counter + 1) {
	echo ("<p>Now the counter is at $counter.</p>");
	}
?>
(This code produces the same HTML as the while loop above.)
A foreach loop is exclusively for looping through the elements of an array. As usual, an example explains this best:
foreach for Indexed ArraysVery often we have an indexed array and want to output the values of each element. We can’t simply run echo($array_name) — that will throw an error because we haven’t specified which element we want echoed. If we want to echo each element in turn, we run a loop:
<?php
	// create indexed array of users
	$users[0] = "joe";
	$users[1] = "jane";
	$users[2] = "jill";
	$users[3] = "jeff";
	// loop through each element
	foreach $users as $each_user { // notice we create a temporary scalar variable ($each_user) for the purposes of accessing each element value in the foreach loop
		echo ("<p>A user is named $each_user.</p>");
		}
which will produce the following HTML:
<p>A user is named joe.</p>
<p>A user is named jane.</p>
<p>A user is named jill.</p>
<p>A user is named jeff.</p>
foreach for Associative ArraysAssociative arrays get a little more complicated, because you may want to access both the key and the value of each element within the loop. Note the $key=>$value syntax.
<?php
	// create associative array of user joe
	$user[name] = "Joseph Schmoe";
	$user[age] = 25;
	$user[nickname] = "Joe";
	$user[catname] = "Esmerelda";
	// run the loop
	foreach ($user as $key=>$value) {
		echo ("<p>This array has a key $key with a corresponding value $value</p>");
		}
?>
… which will produce the following HTML:
<p>This array has a key name with a corresponding value Joseph Schmoe</p>
<p>This array has a key age with a corresponding value 25</p>
<p>This array has a key nickname with a corresponding value Joe</p>
<p>This array has a key catname with a corresponding value Esmerelda</p>
Found this other CSS selector for targeting children. It's called nth-child() and it's pretty cool. Inside the parenthesis you can put a 2 or 3 or whatever you like. To target the child. Also, some mathematical formulas can go inside the parenthesis for targeting multiple children. nth-child(3n+0) would target children that are a multiple of 3. Even using nth-child(odd) and nth-child(even) works. Just thought that was pretty interesting and handy.
This exercise requires you to loop through some provided blog posts and write a quick stylesheet to lay the content out on the page. As usual, you’ll need to create a new directory on your server space and upload your files there each time you make a change.
This is pretty cool: Pea.rs is a set of “design patterns” with sample HTML and CSS for you to borrow. So if you’re making a thumbnail grid or other common design element, take a look here to see if it will speed up your process.
The whole site is a Wordpress theme, so you could take it and construct your own set of design patterns that you use often or want to share.
I saw this really interesting article on A List Apart. I thought it was a really good read. It has lots of information if you're planning on making responsive sites that look consistent on many devices. It talks about the difference between how pixels are rendered on different devices and how to target them better. It suggests using ems as the measurement for everything you would have previously used a pixel for. This way the whole site will be viewed properly no matter the device, zooming, etc. Informative read.


"A developer might look up information on these two devices and think that if the screens are the same and they both use the Webkit rendering engine their website will look the same. Sadly this is not the case; as far as a website is concerned, the Galaxy Tab is 400px × 683px and the Kindle Fire is 600px × 1024px "
Functions are a very powerful tool in PHP that help you follow the “DRY” rule of programming: Don’t Repeat Yourself. Functions essentially let you use and construct self-contained actions that can be executed multiple times throughout your page or your website. Think of a function as a little factory: you give some input, and the function “returns” some output to you. As long as you know what the function does, you don’t need to worry about its particular internal mechanics — and you won’t see the process — each time you run it.
Here are three things to remember about functions:
function, your function name (with parentheses), and then curly braces specifying what should happen with whatever inputs are provided. See “Defining your Own Functions” below for an example.PHP functions can be recognized by the syntax function_name() or function_name ("some input"); the parentheses are the place we insert our parameters, if any. The date() function, built-into PHP, uses the server clock to look up the current date and return whatever it is to the PHP process. date() accepts a letter of the alphabet so that you can choose what part of the current date — and in what format — you want the function to return a value. (It’s hard to remember which letter input retreives which output — most people just look up the answer on this PHP.net reference page).
A small number of functions can be run without storing their returned output. The classic example is echo, which takes as its input whatever string you want to appear in the web page:
<?php
	$my_message = "Hello World"
	echo ($my_message); // outputs "Hello World" on the web page.
?>
Another example is date_default_timezone_set, which takes a location string as its argument and alters the time zone setting for subsequent PHP code:
bc(brush: php).
date_default_timezone_set(‘America/Chicago’); // doesn’t echo anything, but any date or time function run after this will be according Central Time
?>
But more common are functions designed to have their returned values stored in variables that we create:
<?php
	$this_month_ = date('F'); // stores something like "February" in $this_month
	$this_year = date('Y'); // stores something like "2012" in $this_year
?>
Some functions take multiple variables as their arguments. In these cases, you need to be sure to input them in the correct order. Let’s use the substr function (“sub-string”), which needs to know both what the string is and how much of it you want in order to return a sub-string. When you look up the instructions, you’ll see you can specify (1) the string, (2) the position of the first character you want, and (3) how many characters to include from that point.
<?php
	$string = "apples";
	$segment1 = substr($string, 1, 3);  // returns and stores "ppl"
	$segment2 = substr($string, 0, 5);  // returns and stores "apple"
?>
Functions are possibly easier to understand when you define your own, rather than using one of PHP built-in functions. Here are some things to keep in mind:
include: you will often see an something like include ('site-functions.php') at the top or bottom of a page, and the site-functions.php file will be used to store every function that the site might need.<?php
// define the average_these_numbers function, which requires two arguments
function average_these_numbers($number1, $number2) {
$sum = $number1 + $number2;
$average = $sum/2;
return $average;
}
?>
The code above creates and defines how the function will work (note the reserved word function at the beginning), so it only needs to be done once. Once defined, that function can be run repeatedly on different number pairs:
<?php
	$avg = average_these_numbers(4, 8);  // returns and stores 6
	$avg = average_these_numbers(10, 20); // returns and stores 15
	$first_number = 4;
	$second_number = 16;
	$avg = average_these_numbers($first_number, $second_number); // returns and stores 10
?>
Note that in the last example, the inputs were first stored in scalar variables and then passed as inputs to the function. And notice that we did not have to use $number1 and $number2 as our variable names. Yes, we happened to use $number1 and $number2 within the function definition, but once defined, we can run the function by passing any two values to it, and the function will always treat the first input as $number1 and the second input as $number2. The fact that we passed in our parameters using $first_number and second_number when running the function is no problem.
Hopefully this makes some intuitive sense — it has to do with the “scope” of the variables we are using at each stage. You can read more about variable scope on the PHP.net site.
Wordpress provides a host of PHP functions that output information store in your database. Here are some of the most common functions and some examples. Much of the information is taken from the Wordpress Codex’s article Stepping Into Template Tags, which you should take a look at.
Some of Wordpress’s functions can be used anywhere on the page: in the header or footer, inside a Wordpress loop or outside of it. The function bloginfo() is probably the most common:
bloginfo()This is a function that takes a keyword as an argument and outputs info about your site, most of which are controlled by the settings under Settings > General. This is best shown through examples:
<?php
	bloginfo('name'); 					// echoes "James's Blog"
	bloginfo('description');			// echoes "A Website about Design"
	bloginfo('url'); 					// echoes "http://watkinswebdev.com/jmuspratt/demo/"
	bloginfo('template_directory'); 	// echoes "http://watkinswebdev.com/jmuspratt/demo/wp-content/themes/starterkit/"
?>
It’s important to note that in the last two examples, the function outputs a raw URL. If you want to link to the page at that URL, it’s up to you to wrap that URL in a link tag and open and close PHP correctly. So if we want to construct a link that goes to the home page, think about it as three logical steps, working backwards from the output you want to create with PHP:
<a href="http://watkinswebdev.com/jmuspratt/demo/">Visit the home page.</a>bloginfo('url'); only outputs the URL of the blog, you’re going to have to turn PHP on and off inside the quotation marks of the href attribute. In other words, you’ll do something like this: <a href="PHP_GOES_HERE">Visit the home page.</a><a href="<?php bloginfo('url'); ?>">Visit the home page.</a>
For the complete list of options, visit Wordpress Codex: bloginfo().
bloginfo() works outside the loop because its information is consistent no matter what post or page the user is viewing. Since the functions that output the contents of a post obviously do differ from post to post, they must be used inside the Loop. In Starter Kit, you can open single.php and the file snippet-post.php for a good example of what follows below.
the_title()To echo the title of each post, use the_title(). Note that Wordpress provides a few optional parameters illustrated by the examples below. The first two parameters represent opening and closing HTML tags that Wordpress can add to the title, while the third is a boolean value called “display” which controls whether to echo or return the title. If you override the default TRUE value by specifying FALSE, you can use the function to store the returned value instead of echoing it.
<?php
	the_title(); 				// echoes "My Blog Post"
	the_title('<h3>', '</h3>'); // echoes "<h3>My Blog Post</h3>"
	the_title('', '', FALSE);	// doesn't echo anything, but RETURNS "My Blog Post"
?>
See also: Wordpress Codex: the_title().
the_permalink()The permalink is the unique URL given to every post so that it can be bookmarked, emailed, and linked to even if that post falls off the home page’s display of recent posts. Note that the particular style/formatting of the permalink can be globally altered under Settings > Permalinks.
<?php
	the_permalink(); 	// echoes "http://example.com/news/my-post"
?>
Like bloginfo(), the_permalink() outputs a URL, not a complete hyperlink. It’s therefore common to combine it with the_title() so that you get a meaningful link text linked to each URL:
<a href="<?php the_permalink(); ?>"><?php the_title(); ?></a>
which would output:
<a href="http://example.com/news/my-blog-post">My Blog Post</a>
See also: Wordpress Codex: the_permalink().
the_content()The main editing window in a Wordpress post editing screen isn’t labeled, but it is referred to as the “content” field throughout Wordpress. Remember that Wordpress automatically wraps paragraphs in <p> tags, inserts <br /> tags for soft returns, and may add classes to images that appears in the content field.
<?php
	the_content(); 			// echoes "<p>Today I had a chicken sandwich.</p>"
?>
If you’re interested in automatically splitting your posts into shorter and longer versions, read up on the “Read More” option in the codex: Wordpress Codex: the_content().
the_date() and the_time()These two functions are a lot like the native PHP date() and time() functions, but they refer to the date/time that each post was published. You have extensive control over the syntax and formatting by using different letters for the function parameters.
<?php
	the_date('Y-m-d', '<h2>', '</h2>');		// echoes "<h2>2011-10-12</h2>"
	the_date('F j, Y');						// echoes "October 12, 2011"
	the_date('F j, Y', '<h2>', '</h2>');	// echoes "<h2>October 12, 2011</h2>"
	the_date('F j, Y', '<h2>', '</h2>', FALSE);	// returns "<h2>October 12, 2011</h2>"
	the_time('d/m/Y \a\t g:i A');			// echoes "10/12/2011 at 10:43 AM"
?>
Note: In Starter Kit, I used the_time() instead of the_date() to output the date of each post. The reason: the_date() is designed to be used in long lists of posts (as on an archive page) where multiple posts might have the same date. The default behavior in this situation is to output the date just once for each group of posts that share that date (this way, dates can be used more logically as headings). This can be useful for that particular kind of archive page, but if you really want to output the date for each and every post, you’re forced to use the_time(), which doesn’t have that bug/feature.
See also: Wordpress Codex: the_date(), Wordpress Codex: the_time() and Wordpress Code: Formatting Date and Time.
If you look at the snippet-post.php file, you’ll see something similar to the code below (which is simplified a bit). It illustrates how these core functions can be used inside HTML to output (with PHP) and structure (with HTML tags) a blog post.
<?php if ( have_posts() ) : while ( have_posts() ) : the_post(); ?>
			<h3><?php the_time('F j, Y');?></h3>
			<h1><a href="<?php the_permalink(); ?>"><?php the_title(); ?></a></h1>
			<?php the_content(); ?>
		<?php endwhile; ?>
		<?php endif; ?>
For each post, then, this will output something like this:
<h3>October 12, 2011</h3>
<h1><a href="http://example.com/news/my-blog-post">My Blog Post</a></h1>
<p>Today I had a chicken sandwich.</p>
In non-CMS-powered websites, it’s common to create a bunch of HTML or PHP files that link to each other. To keep things organized, we usually name our files descriptively and bundle them into folders (aka directories). Once we upload them to our web server, they then become available at addresses that reflect these file and folder names.
So depending on the complexity of our site, we might end up with URLs that look like these:
http://example.com/about.html
http://example.com/tutorials/making-a-web-page/
http://example.com/crazy-stuff/interactive-projects/project4/step2.php
The only tricky rule here is that when a URL ends in a slash (like the second example above), most web servers will load index.php or index.html if either exists.
It’s important to recognize that these human-readable (or “clean”) URLs carry important information:
about.html). If a user bookmarks the URL, emails it to a friend, or saves it in a text file for later, they will still have a good idea of what the page contains without having to click on it.http://example.com/tutorials/ or http://example.com/crazy-stuff/interactive-projects/.On big, database-driven sites, it’s common to see URLs that use unusual characters, coded language, and long strings of characters and numbers:
http://example.com/kb/index.php?cat=8&id=41
http://example.com/?articleID=45434341
Here are some pretty bad real-world examples (my personal favorite is the LinkedIn one, which is what you get when you click on Joe Smith’s name after doing a search).
http://www.amazon.com/Making-Mirrors/dp/B006ZDU7QI/ref=sr_1_1?ie=UTF8&qid=1329151184&sr=8-1
http://search.yahoo.com/search;_ylt=A0oG7klsOzlPFWYApwBXNyoA;_ylc=X1MDMjc2NjY3OQRfcgMyBGFvAzAEZnIDeWZwLXQtNzAxBGhvc3RwdmlkA3Z3N3ZZa29HN3Y3dlVxbmNUczc3T3dBRFl5MHl2azg1TzJ3QUN4RXUEbl9ncHMDMTAEbl92cHMDMARvcmlnaW4Dc3JwBHF1ZXJ5A2pvZSBzbWl0aARzYW8DMQR2dGVzdGlkA0g0NjU-?p=joe+smith&fr2=sb-top&fr=yfp-t-701
http://www.linkedin.com/profile/view?id=34735695&authType=NAME_SEARCH&authToken=9hD5&locale=en_US&srchid=7a0a9838-fb41-4cf8-9a67-1d74433f4c37-0&srchindex=2&srchtotal=10883&goback=%2Efps_PBCK_joe+smith_*1_*1_*1_*1_*1_*1_*2_*1_Y_*1_*1_*1_false_1_R_*1_*51_*1_*51_true_*2_*2_*2_*2_*2_*2_*2_*2_*2_*2_*2_*2_*2_*2_*2_*2_*2_*2_*2_*2_*2&pvs=ps&trk=pp_profile_name_link
URLs like these are optimized for the databases that control the websites, not for the actual people who need to use those sites. They suffer from poorer Google rankings and aggravate users who have to work with them through common tasks like reading, storing, collecting, bookmarking, copying/pasting, etc.
Wordpress uses a MYSQL database for storage and displays database content through PHP templates. This means that every time a post or page is displayed, Wordpress is assembling the HTML “on the fly.” There is no collection of static HTML files whose filenames would appear in the URLs — instead, page contents are retrieved through the same GET requests that we used when developing forms last semester.
The URL for a GET request begins with the address of a normal PHP file and is followed by a question mark, a variable name, the equals sign, and the variable contents. For example, a weather page might show different data for different zip codes, and the corresponding URLs might look like this:
http://example.com/showweather.php?location=37204
http://example.com/showweather.php?location=37206
As we saw with PHP forms, this is the way that a single PHP file (showweather.php) can display different outputs. It receives the location variable as part of the URL, uses it in some what to retrieve weather data, and then outputs HTML that is appropriate for that URL.
The default (and “true” in some sense) URL of a typical Wordpress post looks like one of these:
http://mysite.com/index.php?p=27
http://mysite.com/?p=27
This is in fact very similar to the weather example above: index.php is the PHP file that can access a database and is set up to display different content depending on the variable it receives, while p (which stands for Post) is the variable that will contain the ID number for each post. Because index.php is always the default file shown in a directory, Wordpress usually drops it and just uses the http://mysite.com/?p=27 format.
Whenever possible, we want to get rid of the ugly and noninformative default URLs and use “clean” URLs that look more like the simple, old-school, directory-path-leading-to-a-filename format.
Even though we won’t actually be creating directories and files, the web server software Apache has a module called mod_rewrite. The mod_rewrite module is installed on most (but not all) web servers, and it enables the server to generate and recognize human-readable URLS and map them to the correct posts in the Wordpress database.
Wordpress gives us a number of clean URL structures out of the box. Choose Settings > Permalinks and you’ll see them:

All except the first count as “clean”. On watkinswebdev.com, which is hosted by Dreamhost, security settings require that once we’ve chosen our structure, we need to edit or create our .htaccess file in the root folder of our Wordpress installation. We’ll go over this in class, but note that if you ever change your Permalink Settings, you’ll need to update the .htaccess file with the new code as well.
The Custom Structure option enables you might to choose your own format. One that I have used often is /%category%/%postname%/. This would result in permalink URLs that looked something like this:
http://watwkinswebdev.com/jschmoe/blog/features/how-i-came-to-love-garamond
If you want to explore other possibilities, take a look at the Wordpress Codex’s page Using Permalinks for the rundown on all the possible variables.
I really like this site because it used a ton of eye-catching info-graphics. I thought it was also interesting because it was about college websites and our pretty much stinks. It was nice how the other html pages didn’t cover the entire home html page.

Best Education Sites
This was a site that is powered by wordpress. It thought we might be able to use some inspiration. I thought this one was really nice how it used all application icons and evolved a ton of icons to look like a app icon. The nice thing was that you could use these icons for your own use, or you can buy them.
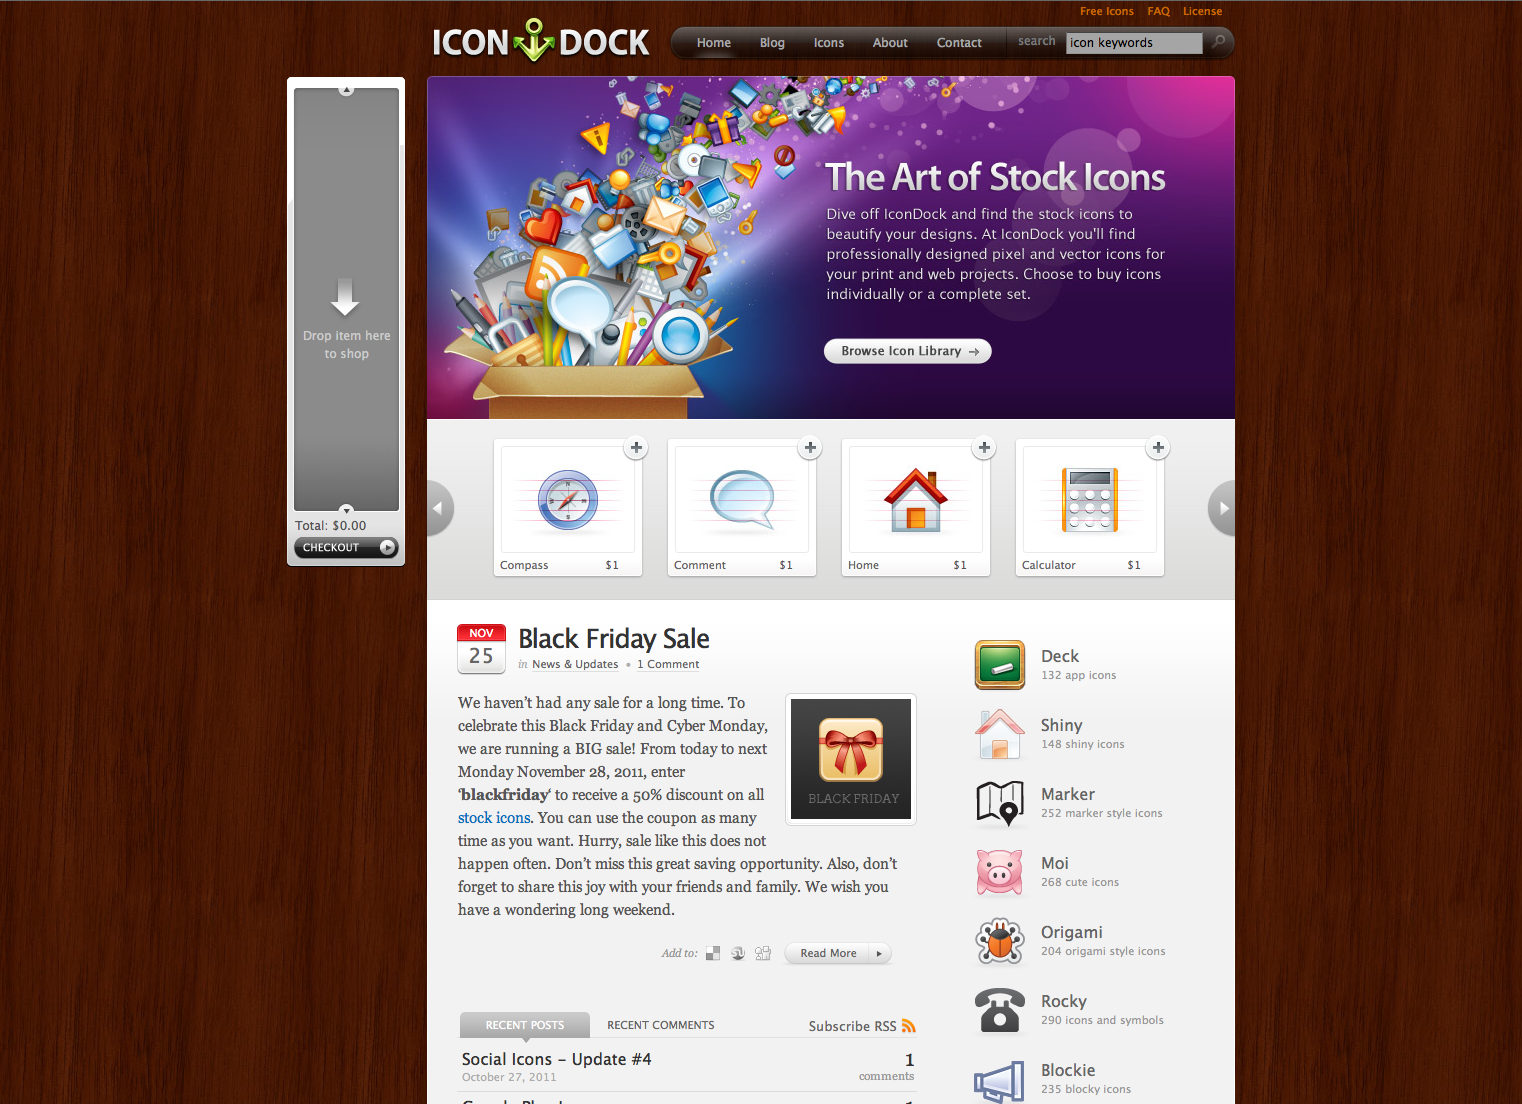
Icon Dock
This is another site powered by wordpress. It is a type heavy site that showcased them as images. I thought the grid work on the blog page. It featured the type as thought it was an image. Then you click on the image of text which takes you to the permalink page. I thought this website was great!
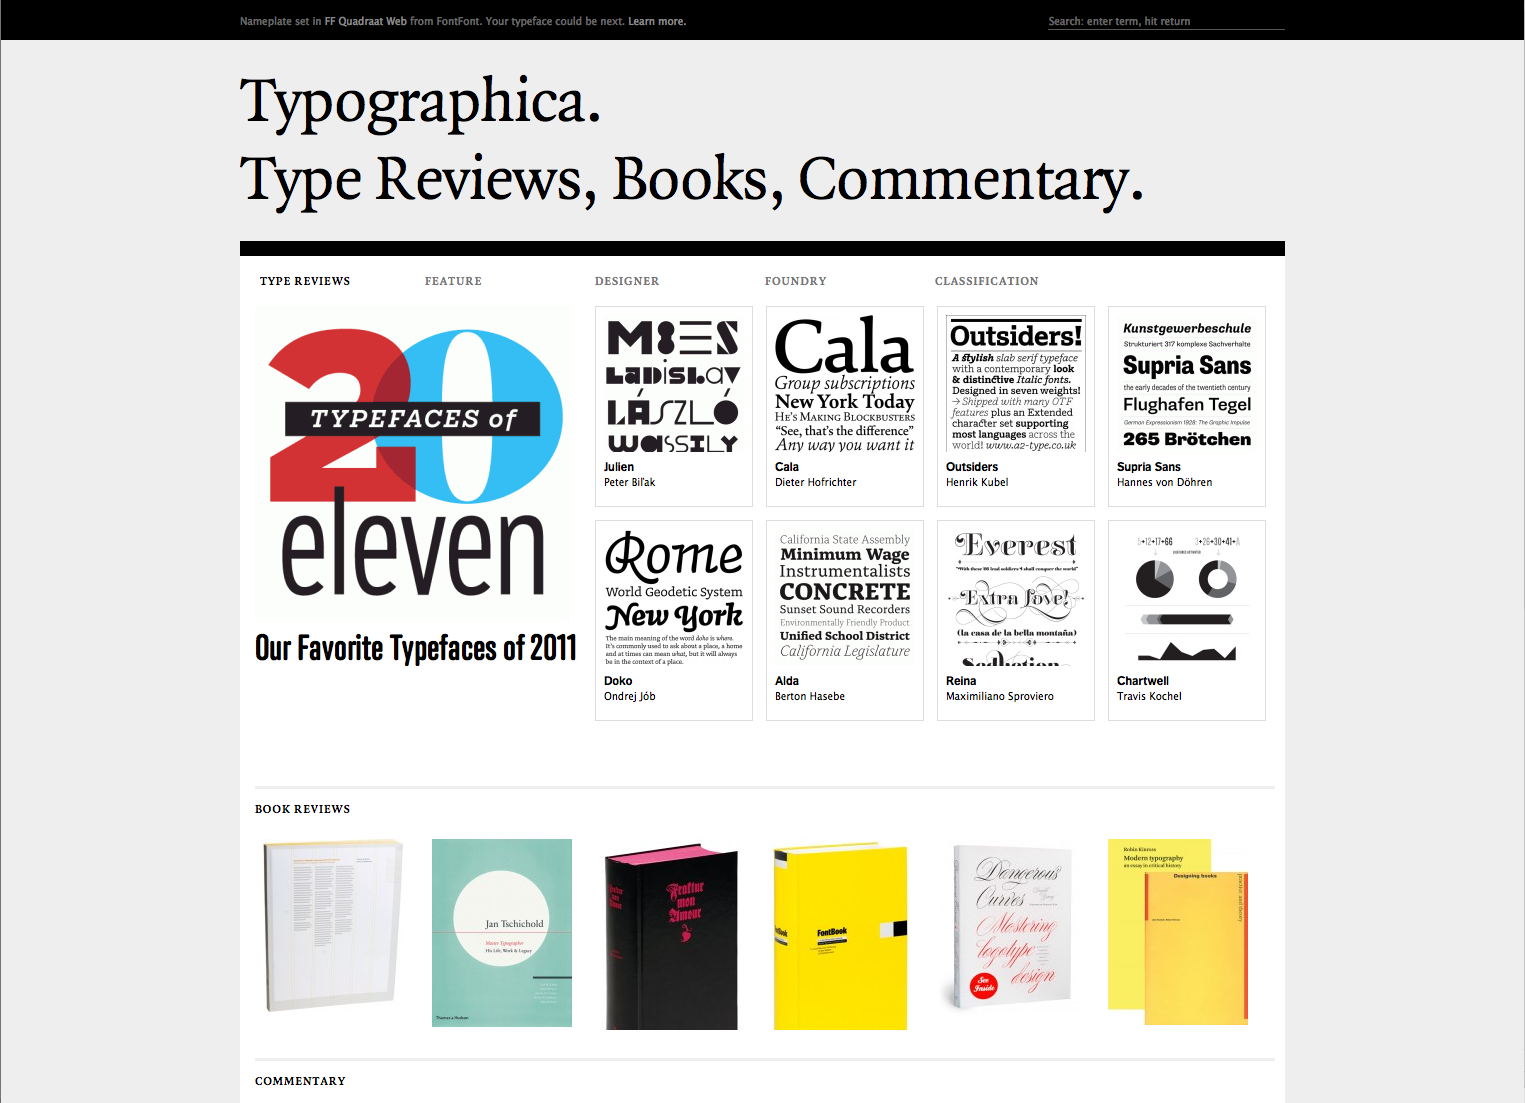
Typographica
As we’ve discussed, Wordpress provides two primary ways to use images on your site. First is the Insert into Post method, where your image becomes part of the flow of the content field: you could conceivably use this method dozens of times in a long post, interspersing your text with images wherever they are most relevant.
The second option is using the Featured Image pane, also known as the Post Thumbnail. By assigning an image to the post as the Featured Image, it becomes a post “attachment”. The disadvantage of this method is that you only get to use one image per post, and you can’t insert it into the middle of your content. But the advantage is you have more flexibility when it comes to layout and image customization. For instance, on an archive page you could show that featured image as a small thumbnail image alongside each post title, but on the permalink page that same image could be output at full size at the top of the content area. You can think of the Featured Image as another database field, like the Post’s Title and Category, that happens to contain an image file.
When you click Upload/Insert in a Post, you can either upload a new image or choose one from the existing Media Library. Once you’ve uploaded/selected your image, you’ll see the various image settings available to you. (Note: in general you’ll want to set Link URL to “None”, unless you particularly want the image to be linked to its full-size version. The other fields are fairly self-explanatory.)
Scroll down to the four Size options: Thumbnail, Medium, Large, and Full Size:

When you upload an image, Wordpress automatically generates these three sizes of thumbnails in addition to storing the original image, and before you click Insert Into Post you can decide which image size is most appropriate.
To change these sizes globally, visit Settings > Media and type in new numbers for Thumbnail Size, Medium Size, and Large Size. Note that only Thumbnail allows for the option to crop the image to exact dimensions — Medium and Large preserve the aspect ratio of the original. When you next use Insert into Post, you’ll find your sizes have been updated.
It’s important to understand that the Thumbnail/Medium/Large sizes only affect images inserted into the post content. If you click the Medium size option but then click Set as Featured Image, that does not mean the Medium sized image will be used in your template.
Instead, featured image sizes are controlled by settings stored in your functions.php file. Open functions.php and you’ll how it works. The first two lines just set up the ability to add custom sizes, and you can leave them as they are. But the add_image_size settings allow you to create (and give names to) any number of image sizes, and you can choose whether or not they should be cropped. I recommend avoiding the words “Thumbnail”, “Medium”, and “Large” to avoid confusing them with the standardized names used by Insert Into Post.
<?php	// Images, Thumbnails, Thumbnail sizes
	add_theme_support( 'post-thumbnails' );
    set_post_thumbnail_size( 300, 200 ); // default Post Thumbnail dimensions
	// Add custom sizes
if ( function_exists( 'add_image_size' ) ) {
	add_image_size( 'huge', 1600, 9999 );
	add_image_size( 'normal', 600, 9999);
	add_image_size( 'mini', 50, 50, true );      // true means cropped
	}
?>
This now means you can run the the_post_thumbnail() function and pass in any of your size keywords as the function paramater (though you probably wouldn’t use them all in a series like this):
<?php
	the_post_thumbnail('normal');	// outputs normal image size (1600 px wide)
	the_post_thumbnail('huge');		// outputs huge image size (600 px wide)
	the_post_thumbnail('mini'); 	// outputs mini image size (50 px by 50px)
?>
So if you want to change these or add an additional size, just add another line to your functions.php file, upload it to your theme, and that new size should now work in your theme templates.
Remember that Wordpress only generates it’s various image sizes and thumbnails at the moment you upload them. If you upload many images and then later change your custom sizes in Settings > Media or functions.php, you will probably have to regenerate your thumbnail images. Fortunately there’s a plugin, called Regenerate Thumbnails, that lets you do this all in one step. Try installing it and running it from Tools > Regen. Thumbnails.
As discussed in class, the PHP files that make up a Wordpress theme do not represent particular URLs or Posts in your database. Instead, they are templates for various page types. For example, single.php controls all permalink pages. Through the use of the Loop and PHP variables, each permalink page contains different content (pulled from the database), but they are formatted and laid out the same way.
Here’s a quick overview are the most important templates that control your site.
single.phpControls the layout and content of a single post or “permalink” page like http://example.com/blog/i-love-garamond.
index.phpControls the home page, but only if you visit Settings > Reading and set Front Page Displays to Your Latest Posts. If instead you set the front page to display a static page, index.php will not be used at all.
category.phpControls category pages like http://example.com/blog/category/essays-about-design.
tag.phpControls tag pages like http://example.com/blog/tag/typography.
page.phpControls Wordpress Pages like http://example.com/blog/about/.
search.php Controls search results pages like http://example.com/blog/?s=paul+rand.
archive.phpControls date-based pages (usually) like http://example.com/blog/2012/02. This particular behavior is dependent on your URL choices under Settings > Permalinks.
author.php Controls author pages like http://example.com/blog/author/jsmith.
Most useful for multi-author sites. Note: “authors” are just the public-facing word for “users” in Wordpress.
You don’t have to make use of every one of the templates listed above. Wordpress has a built-in feature called the “Template Hierarchy” which means that when certain templates are missing from the theme, others will take over to display your content. A good example is archive.php. While archive.php controls date-based browsing of posts, it will be used for category and tag pages if you are missing a category.php or tag.php file.
A related feature enables you to create additional templates that control a specific Page, Category, Tag, etc. I’m calling these “custom templates.”
Let’s use a custom Page template as an example. Suppose we’ve created a few Wordpress pages that are being displayed on our site: About, Contact, and Colophon. The content for each page is of course determined by the content fields in Wordpress, and the layout and HTML is determined by our page.php template. Suppose page.php is designed with a main column and sidebar to match our blog and portfolio. Now suppose we want to post a new page called Birthday Party that has a single main column and no navigation links. The best method would be to duplicate page.php, rename it to page-birthday.php, and edit it. The first change should be to give it a logical Template Name at the top (this also informs Wordpress that this is different from the regular page.php template):
<?php
	/**
	 * Template Name: My Birthday Page
	 *
	 * @package WordPress
	 * @subpackage Starter Kit
	 */
 ?>
 Once we’ve added this new file and uploaded it our theme, it becomes available in the Page Attributes pane for any Page. Once we choose it from the Template pop-up and re-publish the Page, our Birthday Party page will use the new template.
Here’s another example. Suppose we have created blog categories called Features, Essays, and Quick Links. As discussed above, category.php will by default control the category listing pages located at http://example.com/blog/category/features/, http://example.com/blog/category/essays/, and http://example.com/blog/category/quick-links/.
But suppose we want to present Quick Links a little differently. First, we figure out the ID number of the Quick Links category (in Wordpress, click Posts > Categories, hover over the category name and look in your browser’s status bar for the ID). If Quick Links turns out to be Category ID number 3, we could then create a new category template called category-3.php. Once uploaded, http://example.com/blog/category/quick-links/ will immediately start using that template. Unlike pages you don’t need to choose the template from within the Wordpress inteface.
Wordpress is primarily for blogging, and so the primary fields associated with a post make sense for blogging: title, date, content, excerpt, featured image, categories, and tags.
But very often we are using Wordpress posts for non-blog purposes, such as a design portfolio, a staff directory, or a calendar. In these cases we have to decide how to make use of the standard blog fields. In a design portfolio, we’d probably use title for the name of the project, content for the project description, featured image for the project photo/screenshot, and perhaps tags for the project media type (print, web, animation, etc.), so that visitors could see all the projects of a certain type. But what if we implement a system like this and find we have additional information that don’t neatly fit into the available fields? This is where custom fields come in.
In Wordpress, choose Posts > Add New and click on Screen Options. Tick the Custom Fields checkbox, close Screen Options, and scroll to the bottom of the Post editing screen. Here you’ll see the Custom Fields pane. This pane allows you to add any number of custom fields, each of which must consist of a field Name and a field Value.
Lets say you’re constructing your web design portfolio and in addition to showing the project screenshot and description, you also want to (a) link to the live URL of the project and (b) credit the people you collaborated with. For each project post, you could just add a new paragraph in your project description that contained the link and credit info. But the problem with this technique is that it embeds this information inside a field where it doesn’t really belong. Suppose you wanted to output this “metadata” into a different <div> than the_content(), or if you change your mind and want to insert it before the description. In both those cases you’d have to edit every post in your Wordpress database in order to update all your markup.
 So instead, it makes more sense to store your credits and project URL in individual custom fields. This ensures maximum flexibility: if you redesign your site in a few years and alter your theme files to output different markup, you won’t have to manually edit the contents of every project post.
Wordpress provides a simple function called the_meta() which outputs all of your custom fields names and values, with each field wrapped in a list item of an unordered list:
<?php
	 the_meta();
?>
which outputs:
<ul class='post-meta'>
<li><span class='post-meta-key'>project_url:</span> http://joescoffeeshop.com</li>
<li><span class='post-meta-key'>project_credits:</span> Collaboration with Cindy Sherman</li>
</ul>
This is fine if you just want to display the names and contents of your custom fields.
Sometimes you need more control over your ouput than the_meta() offers. Lets suppose we want to wrap differnt markup around our two custom fields. First we’ll use we’ll use the get_post_meta() function. to output our project credits into an HTML paragraph with a class attached. (Notice that we first check to see if $project_credits exists — this prevents outputting empty <p> tags if a particular post doesn’t have any content in project_credits.)
<?php
	$project_credits = get_post_meta($post->ID, 'project_credits', true); // pass in project_credits as a string to retrieve the correct custom value
	if ($project_credits) {
		echo ("<p class=\"credits\">$project_credits</p>";)
	}
?>
which outputs:
<p class="credits">Collaboration with Cindy Sherman.</p>
We want to treat our project_url field differently: lets wrap it in a <a> tag with the link text “View Project” so that visitors can just click those words to be taken to the live URL. As above, we’ll run get_post_meta() and store the returned value, but this time we’ll wrap different HTML around it. Notice also how we turn PHP off and on (inside the if conditional) to make writing our HTML easier:
<?php
	$project_url = get_post_meta($post->ID, 'project_url', true); // pass in project_credits as a string to retrieve the correct custom value
	if ($project_url) {
		?>
	<p class="project-link"><a href="<?php echo $project_url; ?>"> Visit Project</a><p>
<?php
	}
?>
which outputs:
<p class="project-link"<a href="http://joescoffeeshop.com">Visit Project</p>
As we’ve discussed, Wordpress templates control every page of that template type. For example, if you have three categories — News, Features, and Quick Links — the template category.php is going to control the HTML output that results when visiting all three URLs: http://example.com/category/news/, http://example.com/category/features/, and http://example.com/category/quick-links/. Most likely the only difference between those pages will be the text at the top (<h1>Posts categorized as News</h1> vs. <h1>Posts categorized as Features</h1>) and of course the particular posts that get listed as belonging to the category.
This rigid logic is the default for almost every template including single.php, tag.php, category.php, and search.php. However, Wordpress provides a host of conditional functions that let you check to see whether a particular category/tag/page (etc.) is being displayed. You can therefore output additional content, hide content, alter styling by adding classes, etc. It’s up to you.
Lets use our “Quick Links” category as an example. Suppose we have written our category.php to display our list of posts in the standard way: we just link each post name to its corresponding permalink page (using the_permalink()) so that visitors can read the whole post by clicking on any of those links.
But suppose our “Quick Links” posts consist only of a post title and custom field called link_url that stores the URL of the external page we are linking to; in other words, Quick Links don’t use the main content field at all, so there’s no particular need to view their permalink pages. For Quick Links, we might want the titles to be linked directly to those external websites. Here’s how we might use the is_category() function inside category.php to alter our code:
<?php
	<h2>Posts categorized as <strong><?php single_cat_title( '', true ); ?></strong></h2>
	<ul class="post-list">
		<?php if (have_posts()) : while (have_posts()) : the_post(); ?>
			if ( is_category( 'Quick Links' ) ) {
				$link_url = get_post_meta($post->ID, 'link_url', true); ?>
				<li><a href="<?php echo $link_url; ?>"><?php the_title(); ?></a></li>
			<?php }
			else { ?>
				<li><a href="<?php the_permalink(); ?>"><?php the_title(); ?></a></li>
			<?php }
			endwhile; else: ?>
		<p>Sorry, no posts matched your criteria.</p>
		<?php endif; ?>
	</ul> <-- /.post-list -->
?>
Here are some other common conditional functions along with some examples:
is_page()Detects whether the URL being displayed is using the page.php template or shows a particular page:
<?php
	if ( is_page( 'About' ) ) {
		echo ("This is the about page.");
	 }
	else {
		echo ("This is not the about page.");
	}
?>
is_single()Detects whether the URL being displayed is using the single.php template or shows a particular post:
<?php
	if ( is_single( '12' ) ) {
		echo ("This is the post that has ID 12.");
	 }
	if ( is_single( 'I love Design' ) ) {
		echo ("This is the post that has the title I Love Design.");
	 }
?>
has_tag() Detects whether the current post has a particular tag. So probably most useful on single.php.
<?php
	if ( has_tag( 'web' ) ) {
		echo ("This post is tagged as web.");
	 }
?>
is_tag()Detects whether the URL being displayed is using the tag.php template, or is a particular tag page:
<?php
	if ( is_tag( 'web' ) ) {
		echo ("Now listing posts tagged as web.");
	 }
?>
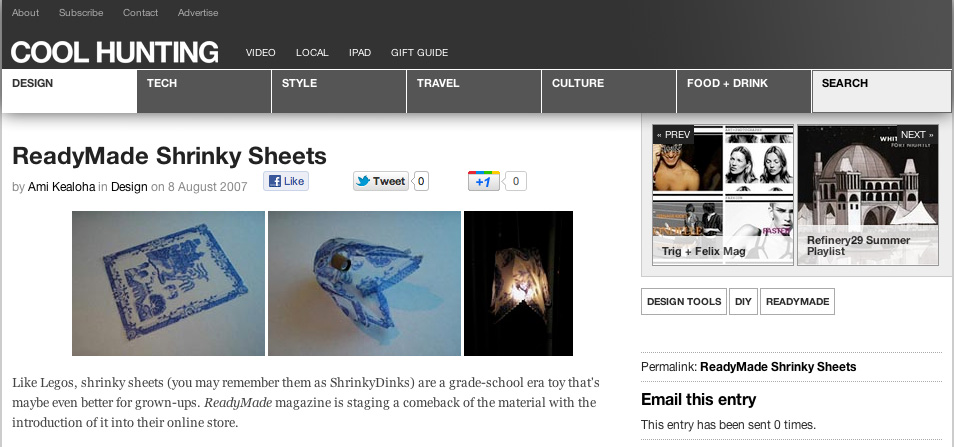
 The next site that I shared, I was not too crazy about but I did like the way that the navigation to the next and previous posts are being handled. They are over to the top right and have images as the buttons. This is the site was created by a group that gathers up all the latest developments in design, fashion, etc. and posts it all on one site as a reference for other designers and is called
Cool Hunting.
The next site that I shared, I was not too crazy about but I did like the way that the navigation to the next and previous posts are being handled. They are over to the top right and have images as the buttons. This is the site was created by a group that gathers up all the latest developments in design, fashion, etc. and posts it all on one site as a reference for other designers and is called
Cool Hunting.
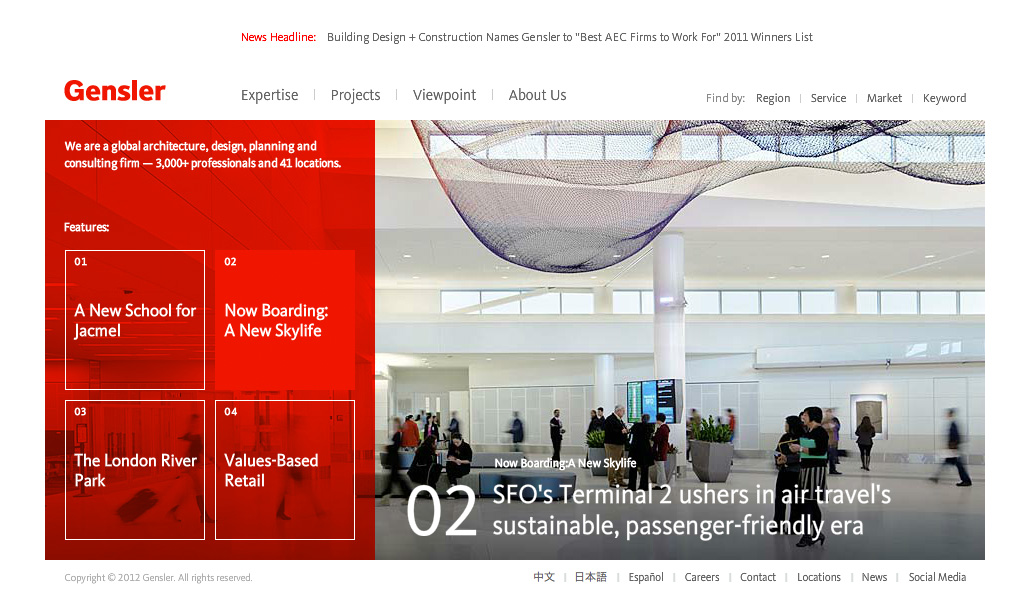
 The third site that I shared I really like. It si very clean and well-organized with a definite hierarchy of information. Unfortunately it uses flash to accomplish the dynamic pieces of the site. It is the site of an architectural firm called Gensler.

The first site We Heart was done in HTML 5. I really liked the format of the different sized boxes across the page and the clean typefaces.
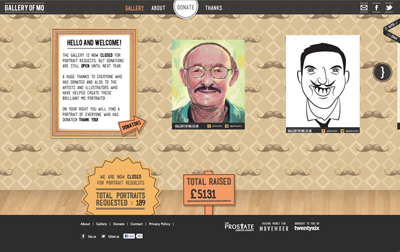
This second site Gallery of Mo, intrigued me because of all the illustration used and how it was executed really well without being too busy.
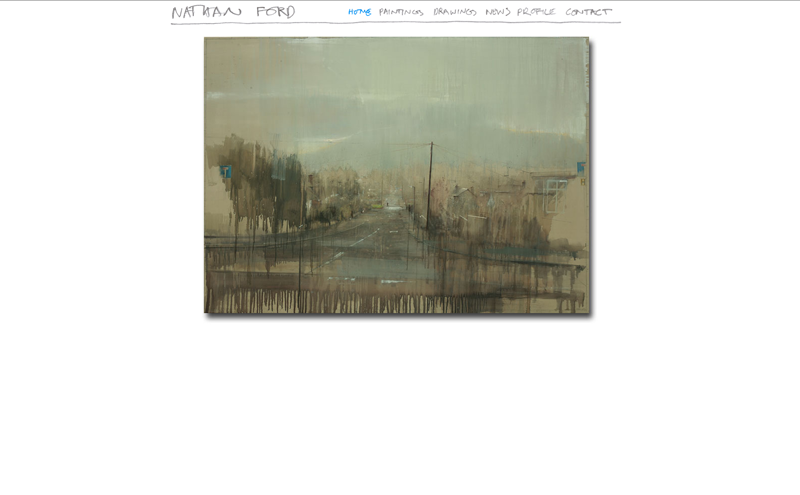
Nathan Ford's portfolio, is one I mainly like because of the hand done navigation and headlines. It's something similar that I want for my own blog for project 1.
It’s common on blogs that post long articles to store a shorter or excerpted portion of the post in the database — this excerpt can then be used where many posts are listed on a page. If a viewer wants to read the whole post, they can click into the permalink version to see it. There are at least two ways to do this kind of thing in Wordpress:
Create a new post and make sure the Excerpt field is visible (check Screen Options if you don’t see it). Try writing a long post in the main Content field and a shorter summary in the Excerpt field.
Now you can insert the_excerpt into your template. However, you may want to combine it with a conditional to control which pages show excerpts and which show the full content. Here’s an example
<?php
if ( is_single() ) { 	// test to see if we're on a permalink page
	the_content();		// show the post content
		} else {		// but otherwise (home page, category page, tag page, archive page)
		the_excerpt(); 	// just show the excerpt
	} ?>
But sometimes you’re using the Excerpt field in your post for some other purpose. In this case, the default usage can backfire.
more divider Try another test: leave your Excerpt empty but write a longish post in the Content area. Now put your cursor between two paragraphs. Find the
 more button in the editing toolbar (shown at left) and click it to insert the more divider.
This now divides your post: the part above more is the excerpt, while the entire post is your content.
Wordpress tries to be a little too helpful sometimes. If you leave the Excerpt field empty, and your template calls the_excerpt() function, Wordpress will auto-generate an excerpt from the first 55 words of your Content and tack on an ellipsis (…) at the end.
So if you don’t want this behavior, and you literally want to grab the contents of the Excerpt field (even if it’s empty), use the object-oriented version like this:
echo $post->post_excerpt; // like the_excerpt() except it will (logically) output nothing if the Excerpt field is empty.
One of the benefits of using a CMS like Wordpress is the ability to build navigation links dynamically in addition to displaying content (like blog posts) dynamically. With dynamic navigation, adding something like a page or category in your Wordpress control panel will do two things: (1) as expected, it will publish that new content and make it available at a URL, and (2) it will add a hyperlink to your navigation that links to that new URL.
wp_list_pages()The Starter Kit theme is already using wp_list_pages() (look inside nav.php). Like many PHP functions, wp_list_pages() accepts a number of arguments that you can specify to control the output. What may be new to you is that rather than accept these paramaters as a series of comma-separated values, the function requires an associative array. Often we store this array in a variable called $args, then pass it in when we run the function. Here’s the canonical example showing some of the most common options:
<?php
// store our options in an associative array called $args
// this is a regular associative array -- the line breaks just make it easier to read
 $args = array(
 	'depth'        => 0,
	'show_date'    => '',
	'date_format'  => get_option('date_format'),
	'child_of'     => 0,
	'exclude'      => '3,5' // don't list pages with IDs 3 and 5
	'include'      => '',
	'title_li'     => '', // you must specify an empty string like this to keep Wordpress from inseting "Pages: " before your list. annyoing.
	'echo'         => 1,
	'authors'      => '',
	'sort_column'  => 'menu_order, post_title', //we can control the output order by editing Page Attributes > Order in each page. Or we could just set this as post_title and have it sort alphabetically
	'link_before'  => '',
	'link_after'   => '',
	'walker'       => '' );
	// now run the function, passing in $args as the argument
	// Wordpress will wrap each link in an <li> tag and attach a bunch of classes (which it thinks might be useful to each <li>)
	wp_list_pages($args);
	?>
Note that all of these values have defaults set, and so you can safely leave them out of your arguments array if you don’t need to alter them (this is the advantage of collecting all the options in an associative array). Check out the defaults by reading about wp_list_pages in the Wordpress Codex.
Here’s some example output that wp_list_pages() might produce:
<li class="page_item page-item-126"><a href="http://example.com/new-page/">New page</a></li>
<li class="page_item page-item-5"><a href="http://example.com/about/">About</a></li>
<li class="page_item page-item-7"><a href="http://example.com/contact/">Contact</a></li>
<li class="page_item page-item-30"><a href="http://example.com/colophon/">Colophon</a></li>
Since this is just a series of <li> tasg with links inside them, it’s up to you to make sure you wrap them in a <ul> and perhaps a <nav> tag in your template.
wp_list_categories()As we reviewed last class, category pages are those pages that looks omething like http://example.com/category/news and are controlled by the category.php file.
Like wp_list_pages(), wp_list_categories() simply outputs links. It’s without having to write them manually. If in the future you add a category to your blog, wp_list_categories() will update accordingly.
Here’s an example with some of the common options in use:
			$args = array(
			   'show_option_all'    => '',
		       'orderby'            => 'name',
		       'order'              => 'ASC',
		       'show_last_update'   => 0,
		       'style'              => 'list', // setting to 'none' would list them without li tags but with <br /> tags  after each one
		       'show_count'         => 1, // lets show the number of posts in each category
		       'hide_empty'         => 1,
		       'use_desc_for_title' => 1,
		       'child_of'           => 0,
		       'exclude'            => '',
		       'include'            => '',
		       'hierarchical'       => false, // don't list sub-categories
		       'title_li'           => '', // no heading please
		       'show_option_none'   => '',
		       'echo'               => 1,
		       'depth'              => 0,
		       'current_category'   => 0,
		       'pad_counts'         => 0 );
			   // no run the function
			   wp_list_categories( $args );
This might produce output like this:
<li class="cat-item cat-item-8"><a href="http://watkinswebdev.com/jmuspratt/demo/category/essays/" title="Longer format writing on design, the web, and pineapples.">Essays</a> (2)</li>
<li class="cat-item cat-item-1"><a href="http://watkinswebdev.com/jmuspratt/demo/category/news/" title="Short updates on current events.">News</a> (12)</li>
<li class="cat-item cat-item-10"><a href="http://watkinswebdev.com/jmuspratt/demo/category/quick-links/" title="View all posts filed under Quick Links">Quick Links</a> (2)</li>
Once again, make sure that this output is wrapped in <ul> tags to keep your HTML valid.
Most of the built-in Wordpress templates are set up so that they automatically retrieve and prepare a particular group of posts for output: For example, tag.php will retrieve all posts tagged as “nashville” when the user visits http://example.com/tag/nashville. To access and output these posts, you put your post functions (the_title(), the_content(), etc.) inside a series of nested if/while/the_post statements that look like this:
<?php if (have_posts()) : while (have_posts()) : the_post(); ?>
	<h1><a href="<?php the_permalink(); ?>"><?php the_title(); ?></a></h1>
	<?php the_content(); ?>
	<?php endwhile; else: ?>
		<p>Sorry, no posts found.</p>
	<?php endif; ?>
When the page loads, Wordpress retrieves all the posts tagged as “nashville”, then outputs the post content according to your formatting inside the loop statement above. This exact code can be used on all of the common templates (index.php, page.php, category.php, tag.php, and single.php).
The key thing to remember is that when you use the default Loop, you can’t see the database query. Wordpress has already made the query based on information in the URL. This makes some intuitive sense: since the if/while/the_post() conditions are accessing a database query that has already occurred, it must have come from the template type itself, not from any particular PHP in your template.
get_posts()In anything but the simplest site, you’ll occasionally want to display post content or links outside of the default Loops. To do so, you need to (1) store your query preferences in an array, (2) run a database query function called get_posts() to retreive the posts, and (3) access the results with an additional loop.
Let’s suppose we have a regular template set up, but we want to add an unordered list of links that contains the 5 most recent posts in the “News” category. Since this will go in our home page sidebar, we open up index.php and add our code in the appropriate <div> or <section> there.
To review, we’ll use get_posts() outside of the default loop using these three steps:
$args$args into get_posts() and store the returned result in $mypostsforeach loop on $myposts to access the content of each post in turn.<h2>Recent News</h2>
<ul id="recent-news">
<?php
// 1. store our loop preferences in an array
$args = array(
'numberposts' => 5, // notice this has to be "numberposts", not "posts_per_page"
'category' => '4', // FEATURES category
'orderby' => 'post_date',
'order' => 'DESC', // the other option is ASC
'post_type' => 'post',
'post_status' => 'publish'
);
// 2. Run get_posts() on the $args array and store the result in $myposts
$myposts = get_posts( $args );
// 3. Run a foreach loop on $myposts to access our content, combined with the annoying-but-necessary setup_postdata function.
foreach( $myposts as $post ) : setup_postdata($post); ?>
<li><a href="<?php the_permalink(); ?>"><?php the_title(); ?></a></li>
<?php endforeach; ?>
</ul>
wp_query()This is the nuclear option, useful for those occasions where you need to create multiple loops and control every aspect of them. It requires some object-oriented syntax (notice the resreed keyword “new” used before wp_query), which we haven’t covered, but you can often get far by copying and pasting examples from the web.
Here’s an example:
<?php
		// Create two queries and store them in different variables
		$featured_query_ = new wp_query('category_name=featured', 'posts_per_page=5','order=DESC');
		$news_query = new wp_query('category_name=news', 'posts_per_page=5','order=DESC');
		?>
		<h2>Recent Featured Posts</h2>
		<ul>
		<?php while ( $featured_query_->have_posts() ) : $featured_query_->the_post();
		?>
			<li><a href="<?php the_permalink(); ?>"><?php the_title(); ?></a></li>
		<?php endwhile;	?>
		</ul>
		<h2>Recent News</h2>
		<ul>
		<?php while ( $news_query->have_posts() ) : $news_query->the_post();
		?>
			<li><a href="<?php the_permalink(); ?>"><?php the_title(); ?></a></li>
		<?php endwhile;	?>
		</ul>
It looks like category.php has a mistake in it. There’s an extra wrapping div around the nav include that shouldn’t be there.
So change these lines….
<div id="nav">
<?php include('nav.php'); ?>
</div><!-- #nav -->
to just this:
<?php include('nav.php'); ?>
Here’s a demo of a relatively simple archive page. (You might want to delete the page-archive.php file that came with your theme, since it uses a different function than the one we’ve discussed.
This method uses the function called get_posts(), described in the post about Wordpress Loops to work, you would do the following:
page.php, duplicate it, and rename the copy to page-archive.php.page.archive.php file in Textwrangler and change the comment at the top to read exactly as it does in the example below. The crucial part is “Template Name: Archive page”, which Wordpress will use to recognize this file as a new page template.page-archge.php, save it, and upload it to your theme directory.Here’s an example of a straightforward archive template that lists all your posts in reverse chronological order. You can of course use different arguments for get_posts(). Refer to the Wordpress Codex to see how.
<?php
/**
 * Template Name: Archive Page
 *
 * @package WordPress
 * @subpackage My Theme
 */
include('header.php'); ?>
<body id="page">
	<?php include('nav.php'); ?>
	<section id="main" role="main" class="cf">
	<h1>Awesome Archive Page</h1>
	<ul class="post-list">
     <?php
        // 1. store our loop preferences in an array
        $args = array('numberposts'     => 999, // notice this has to be "numberposts", not "posts_per_page"
       'order'           => 'DESC', // the other option is ASC
       'orderby'         => 'post_date',
	   'post_type'       => 'post',
       'post_status'     => 'publish'
        );
        // 2. Run get_posts() on the $args array and store the result in $myposts
        $myposts = get_posts( $args );
        // 3. Run a foreach loop on $myposts to access our content, combined with the annoying-but-necessary setup_postdata function.
        foreach( $myposts as $post ) :  setup_postdata($post); ?>
      <?php include('snippet-post-link.php'); ?>
        <?php endforeach; ?>
        </ul>
<?php include('footer.php'); ?>
 Take a listen to this episode of the Web Ahead podcast, where Jen Simmons interviews Eric Meyer. The podcast takes a little while to get going, but once it does you’ll hear some great stories and perspective on the history of the web and his ideas of its long-term future a medium. Eric Meyer was influential in the promotion of CSS as a legitimate web design tool in the early 2000s, and he’s continued to develop some very smart coding techniques since then while working on large projects.
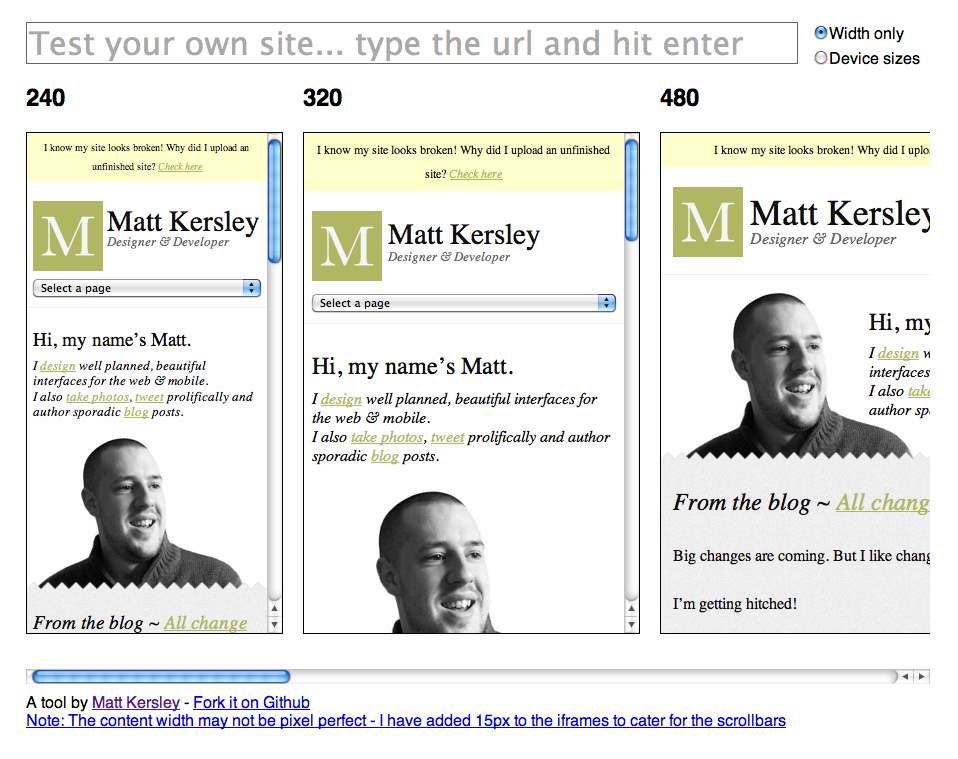
Test all your responsive design here. It works and you can scroll through each size and device.
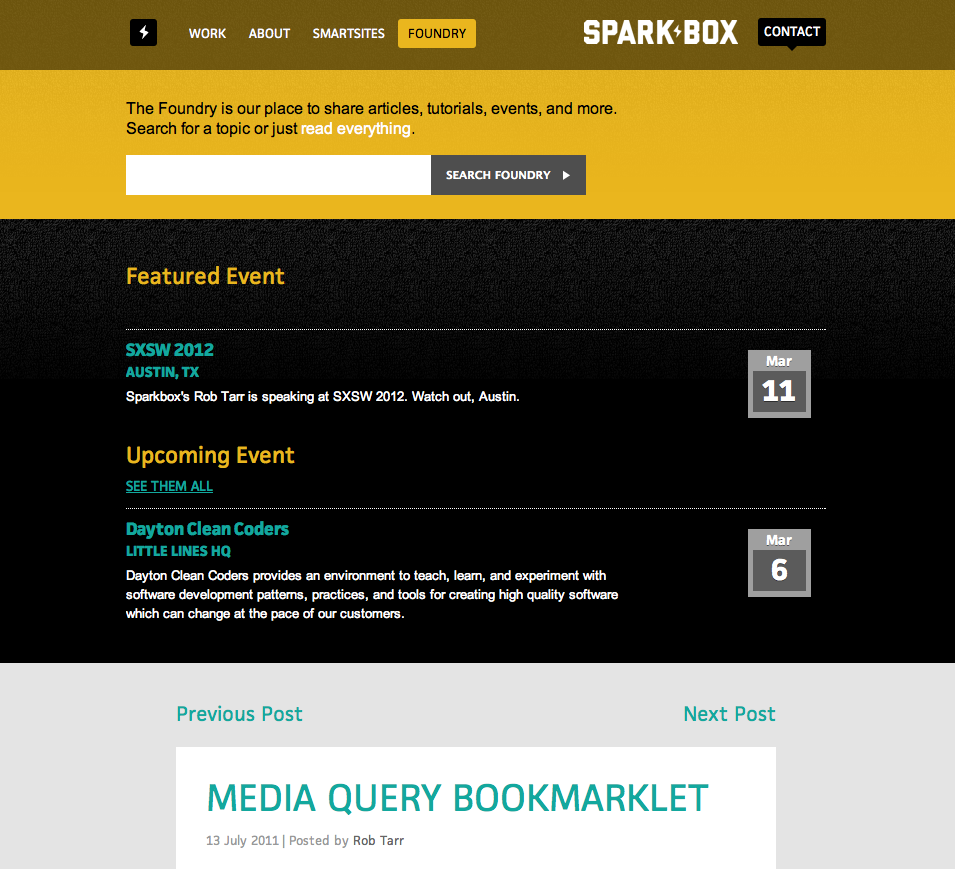
Load this on your browser tool bar and you can see the pixel width and height of your designs.
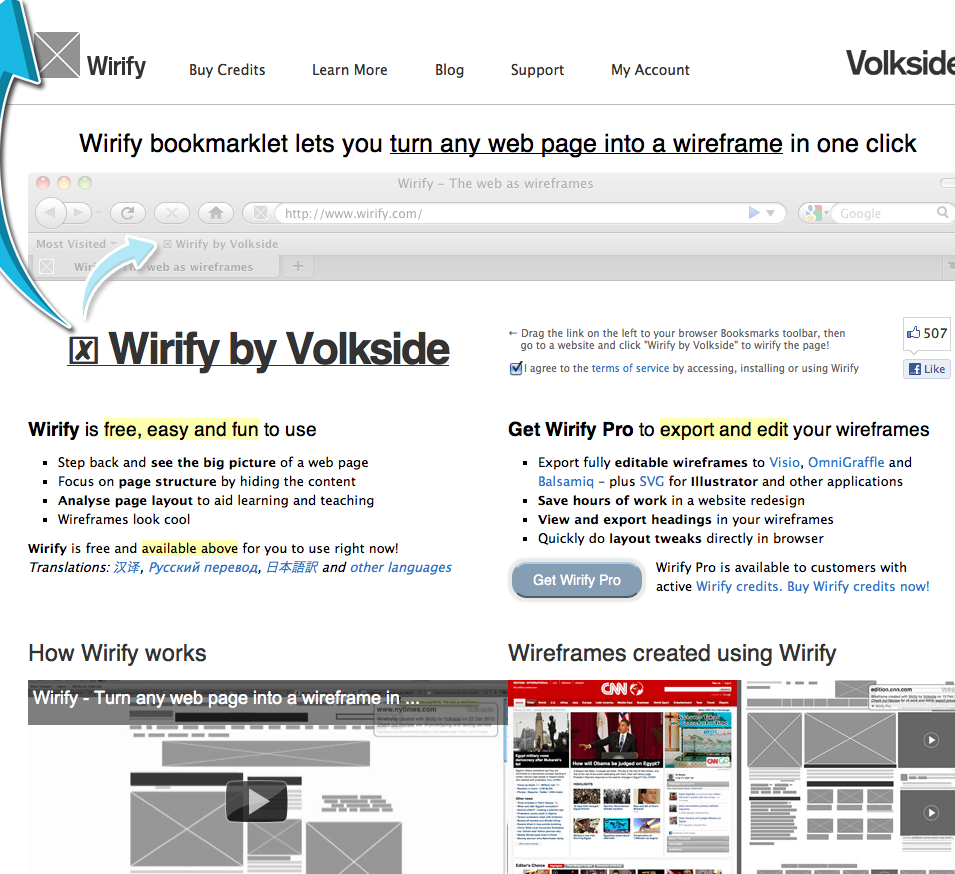
You can see any web site in wireframes. Maybe not so useful but it can give you an idea of how web sites are designed.
Traditional CSS font stacks work by accessing fonts (by name) that are installed on the user’s computer. If the font at the beginning of the stack isn’t installed, the browser will try to use the next font in the stack that is available. Remember to end your stacks with a generic keyword like serif, sans-serif, or monospace.
body  {
	font-family: georgia, serif;
	}
h1, h2, p {
	font-family: "Helvetica Neue", helvetica, arial, sans-serif;
	}
code {
	font-family: "Courier New", courier, monospace;
}
A quick note: very few fonts common to most computers are optimized for screen display, and you should be particularly careful about the scale at which you set them. For instance, Bodoni and Baskerville have very thin strokes designed for print resolution; even the advanced anti-aliasing used by Mac OS X and Windows 7 won’t produce a good result if you set these fonts at 10px.
Cheat sheet: Verdana and Georgia are probably the best fonts that are both common to most Mac and Windows machines and are designed for screen. Thank you, Matthew Carter. Some would add Lucida Grande (or Lucida Console on Windows) to this list, but it doesn’t have real italics.
Here’s the comparison of commonly-used fonts I showed in class.
In the past two and half years, webfonts — that is, font files served from the server and loaded by the browser for a particular website — have gone from theory to reality. The major reasons have more to do with licensing deals than technological progress, but in any case, all the major browsers now support webfonts, though not all the same format. (All the good browsers use the emerging .woff file format, while IE requires a .eot file.)
Depending on licensing and the font vendor, you may end up hosting the font files on your own server or you may link to a font service’s CSS file or Javascript. (All webfont services/foundries will have instructions on how to do this embedding.) Once this basic embedding is done, you can then use straightforward CSS font stacks to assign elements your font choices. Note that good fonts have separate font files for bold and italic, so you may have to do this kind of thing to access the proper files:
body  {
	font-family: "FranklinGothic", arial, sans-serif;
	}
body strong {
	font-family: "FranklinGothic-Bold", arial, sans-serif;
	font-weight: normal; /* prevent double-bolding */
	}
body em {
	font-family: "FranklinGothic-Italic", arial, sans-serif;
	font-style:normal; /* prevent double-italicization */
	}
Note that this makes fallbacks problematic, since if our webfont fails we can’t specifically fall back to an italic version of Arial.
The precise typographic results you get from a webfont — especially as regards anti-aliasing (blurriness) — can vary greatly depending on the care with which the service has constructed the webfont file. The web is filled with complaints about hastily converted fonts that show poor “hinting,” which is the process by which fonts should be customized to anti-alias well. The upshot: don’t buy a webfont from just anyone — use a respected service or foundry that has shown a commitment to quality.
Here are some of the higher quality places to start if you’re interested in using webfonts on a project:
In related news, Hoefler & Frere-Jones are supposedly launching their own webfont service sometime soon. At the moment they have two beta-testers: Jason Kottke and Barack Obama.

Newly released PHP 5.4 is here with some new features. The most interesting one to me is the new CLI virtual server. Some other interesting features include: Default character set changed from ISO-8859-1 to UTF-8, shorter array syntax and traits for classes.
I should have posted something like this a few weeks ago, but anyway here’s a chart of the primary templates you’re using for your blog, and the way the includes get pulled in. Remember that there’s no requirement to use PHP includes in this particular way — the code in them could have been inserted directly into their parent templates. It’s just that since the code for “output a post” or “output a link to a post” is the kind of thing you tend to do on multiple templates, it makes sense to consolidate them into the files I’ve called “snippets.”
Finally, you’re of course free to tinker with any and all of the files; this just shows how Starter Kit was structured when you installed it:
Found this interesting horizontally scrolling website. It's supposed to be a very accurate representation of the size of planets to the sun and their distance. Based on the scale of the image of the sun.

Write a program that lets a human user play Rock Paper Scissors against the computer. Playing the game should have the computer choose a random throw and then echo a string like this:
You threw Rock. Computer threw Paper. Computer wins.
In Terminal, type cd ~/Desktop and hit return. Now type ls and hit return. That should list all the files and folders on the Desktop, so you’re ready to run PHP files that are saved there. (You can review other Terminal commands on the Web 2 blog).
We want to run our script (say it’s called myscript.php) but also pass it a string that represents our “throw”. If you want to want play Scissors, type this:
php myscript.php "Scissors"
And here’s the beginning of the script we did in class:
<?php
// capture the user input (whatever they put after the filename in Terminal)
$user_throw = $argv[1];
// store possiblities in an array
$throws[0] = "Rock";
$throws[1] = "Paper";
$throws[2] = "Scissors";
$random_number = rand(0,2);
$computer_throw =  $throws[$random_number];
echo "\n\n\n\n";
echo "The user threw $user_throw";
echo "\n\n\n\n";
echo "And the Computer threw $computer_throw";
echo "\n\n\n\n";
?>
Bonus Round: Now convert your program into a function which picks a random throw for both User and Computer, plays them against each other, and keeps track of who won. It will look something like this:
function playgame($user_throw, $comp_throw) {
[code goes here]
}
Embed your function in a loop that runs the game 100 times. Output the winner of each game and also announce the total at the end (“User won 35, Computer won 35, and their were 30 ties”).
Update: Below are some possible solutions. There are probably many more ways to do this.
$string = "Tennessee";
$age = 24;
$double_age = 2 * $age;
$age_plus_ten = $age + 10;
// numeric array (AKA indexed array)
	$items[0] = "orange";
	$items[1] = "apple";
	$items[2] = "pear";
	echo $items[1]; 		// outputs apple
	// associative array
	$items[username] = "Joe";
	$items[school] = "Watkins";
if ( $age > 20 ) {
		echo "you are older than 20";
		echo " and that is great.";
		}
	else {
			echo "you are younger than 20";
	}
// built-in to PHP
	$the_year_now = date('Y'); // stores 2012 in my variable
	// build your own
	function year_plus_one() {
		$output = 1 + date('Y');
		return $output;
		}
	$the_year_plus_one = year_plus_one();
	$the_year_plus_two = $the_year_plus_one + 1;
	echo $the_year_plus_two; // outputs 2014
// FOR loop
		for ($i = 1; $i <=10; $i++) {
			echo ("the counter is at $i");
			}
	// FOREACH loop (only for arrays)
		$items[username] = "Joe";
		$items[school] = "Watkins";
	foreach ($items as $key => $value) {
			echo ("For this element, the key is $key and the value is $value.");
		}
I found this really interesting HTML5 tool. Based on some javascript canvas libraries by David DeSandro that was then created into a site by someone else. Very cool, lot's of options. You can add layer after layer and then save the pixelated image.
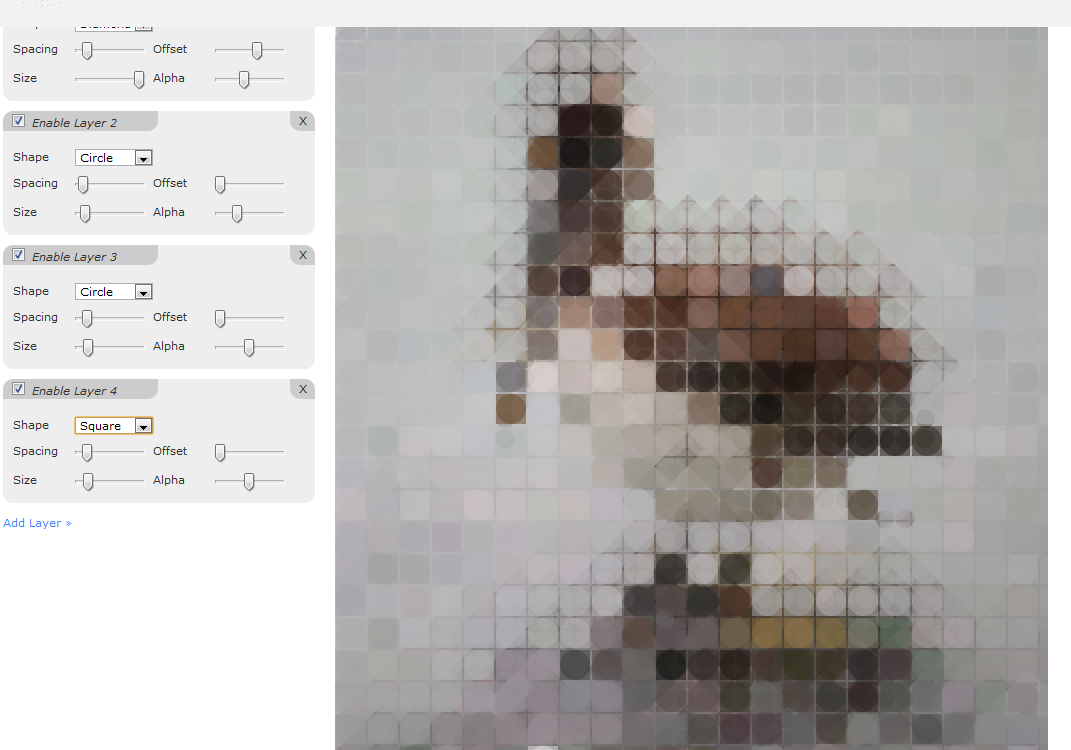
Pretty nice. CSS transitions allow for changes like :hover and :focus to occur over a specified time rather than being instant.
More info here
Also, just discovered that you can use multiple background-images on the same container
Here are some fancy examples of animation created with just CSS. Further proof that Flash has no value anymore.
Create an online visualization of an external dataset or source of visual material.
First choose an external source of text, data, or imagery to work with. Then buld a site that generates a visual expression from that source. Your final pages may be primarily typographic or image-based, informative or beautiful, organized or haphazard, but they should enhance or comment on the source material, and they should change over time or in response to user input. It is crucial that you sketch multiple ideas — both in Photoshop and in code — before arriving at your solution.
Do not feel beholden to traditional representations of your chosen source material; in fact, it may help to avoid them. What would the news report look like as a series of colors? How could a Flickr stream be expressed through typography?
Some possible data sources you might consider:
May 2, 2012
This exercise should be run on your web host. Make a new folder called ex9 somewhere in your account and upload all the files you’ve edited each time you need to see a change.
Looks like PHP files aren’t running (no input file specified) on watkinswebdev.com.
3/30, 12pm: Steve has a note in with tech support
4/1, 10pm: Ugh, it looks like Dreamhost changed the rules so that now sub-users cannot run PHP files. Everybody’s data is still there, and we’re looking into alternative setups.
4/2, 1pm: Ok, everyone has been moved to a new space. Please read up on the changes and follow the instructions.
Hi everyone,
We found a solution, which is to migrate everyone to his/her own subdomain. So if your stuff was at http://watkinswebdev.com/jschmoe/ before, it’s now at http://jschmoe.watkinswebdev.com/ (and your blog is at http://jschmoe.watkinswebdev.com/blog/).
I’ve already migrated all your stuff to the new location(s), but there’s some work left to do. To get set up with the new arrangement, please do the following.
watkinswebdev.com/jschmoe to jschmoe.watkinswebdev.com.Right now you’re probably seeing an Error 404 message at the address of your blog home page (http://jschmoe.watkinswebdev.com/blog/). We need to tell Wordpress where the new files are.
http://jschmoe.watkinswebdev.com/blog/.Very likely the home page is working, but clicking into page or post permalinks throws an error. To fix this, we need to get Wordpress to generate a new .htaccess file
blog folder..htaccess file, delete it by clicking on it and choosing File > Delete. If it’s not there, I already deleted it.Watkins is hosting the Nashville WordCamp on Saturday, April 21st. More info at http://2012.nashville.wordcamp.org
Steve Wilkison has 20 free tickets for students, but you need to email him ASAP if you want to go. The deadline for the free tickets is this Friday.
Enjoy the magic of RSS, XML, and forms.
There are two things to remember here:
explode() function returns an array, where each element is a “piece” from the explosion. None of those elements will contain the explosion string itself. So if I explode on the colon character by writing explode(":", "here:are:four:words");, that will return an array of the four words themselves without any colons.$the_third_element_of_array_name = $array_name[2]. The bracket syntax refers to a particular element in the array, so when you store it in a variable, it’s stored as a plain ol’ scalar variable, not an array.// store a plain old sentence in $sentence
$sentence = "First half of the sentence, second half of the sentence.";
// explode $sentence into pieces wherever a comma appears, and store the (two) pieces that result as an array called $exploded_sentence
$exploded_sentence = explode(", " , $sentence);
// I just want the second piece of the explosion, so I'll access the second element of the array using $exploded_sentence[1] (remember, the first piece can be accessed with $exploded_sentence[0])
$second_half = $exploded_sentence[1];
// $second_half is a plain ol' scalar variable (not an array), so we can run IT through explode(). Let's do so by exploding on the space character: this will return as many pieces as there are words in the sentence
$second_half_exploded = explode(" ", $second_half);
// $second_half_exploded is of course an array, so if we want the first word, we just access it at $second_half_exploded[0]
$first_word_second_half = $second_half_exploded[0];
echo $first_word_second_half;

Kuler is an Adobe website that allows users to brows and submit color combinations. You can then take the colors and adjust them in the browser to get the color scheme you are looking for. It gives you the RGB, CMYK, HSV, LAB, and HEX values of each color so you can use them in a design program.
PatternCooler is a website that allows you to choose from a huge selection of patterns and make a custom colored version that will repeat horizontally and vertically. You can mess with the colors in the browser and input HEX colors if you already know what you want. The patterns range from god awful to actually pretty cool. The more basic designs, such as hexagons or stripes are useful because if you already know what you want it can save you the trouble of making a repeating pattern in Photoshop.
Here’s a quick survey of dynamic projects that visualize data or assemble existing visual material to create something new:
Designing with data or material that is being generated “live” is different from designing known or static content. As with a blog, your job is to design template or “view” that adapts to whatever content it might contain in the future. How can your project re-frame the content by aggregating and re-presenting it? Can the user interact with the content in a meaningful way after it has loaded, by changing its display or switching from a macro view of all the content to a micro view of one piece of it?
Think of the web browser is a modern-day canvas with its own limitations, conventions, and user expectations. Which conventions/limitations do you want to embrace, and which do you want to play against? Think about the fundamentals of the web experience: links, scrolling, typography, images. How can you mix these elements to create something new, compelling, surprising, or delightful?
Using inline CSS in conjunction with PHP.
And here’s a quick reminder of the two types of inline CSS:
You can wrap regular CSS statements in the <head> of your HTML page using the <style> tag:
<!doctype html>
<head>
<title>My Page</title>
<style>
     h1 {color:red;}
     p {font-size:24px; line-height:30px;}
</style>
</head>
...
You can also style a particular element with the style attribute. This will override styles inherited from the main stylesheet or the <style> tag in the page.
...
<p style="font-size:24px; line-height:30px;">My paragraph is large.</p>
...
So if I wanted to generate a random font size with PHP and just affect a single paragraph, I could do this:
<?php
$font_size = rand(10, 50); // generate a random number between 10 and 50
?>
<p style="font-size:<?php echo $font_size; ?>px; line-height:30px;">My paragraph is large.</p>
...
This exercise continues to use the weather report code but has you explore (a) more use of dynamic classes, (b) reading inputs from a text file, and (c) writing a history of inputs back into a text file.
Hilla Katki, Design Director of Data Visualization at Bloomberg
This site was interesting because it showcase the work up and down and side to side. I would have display what they were showing a little better but they way you navigate through the site I thought was very unique and well done.

Grave
I love this website. I thought the website appearance reflected the style of the work really well. It was very simple and clean. I really like the use of the grid work. I think it was a great way to show case their work without overdoing it.
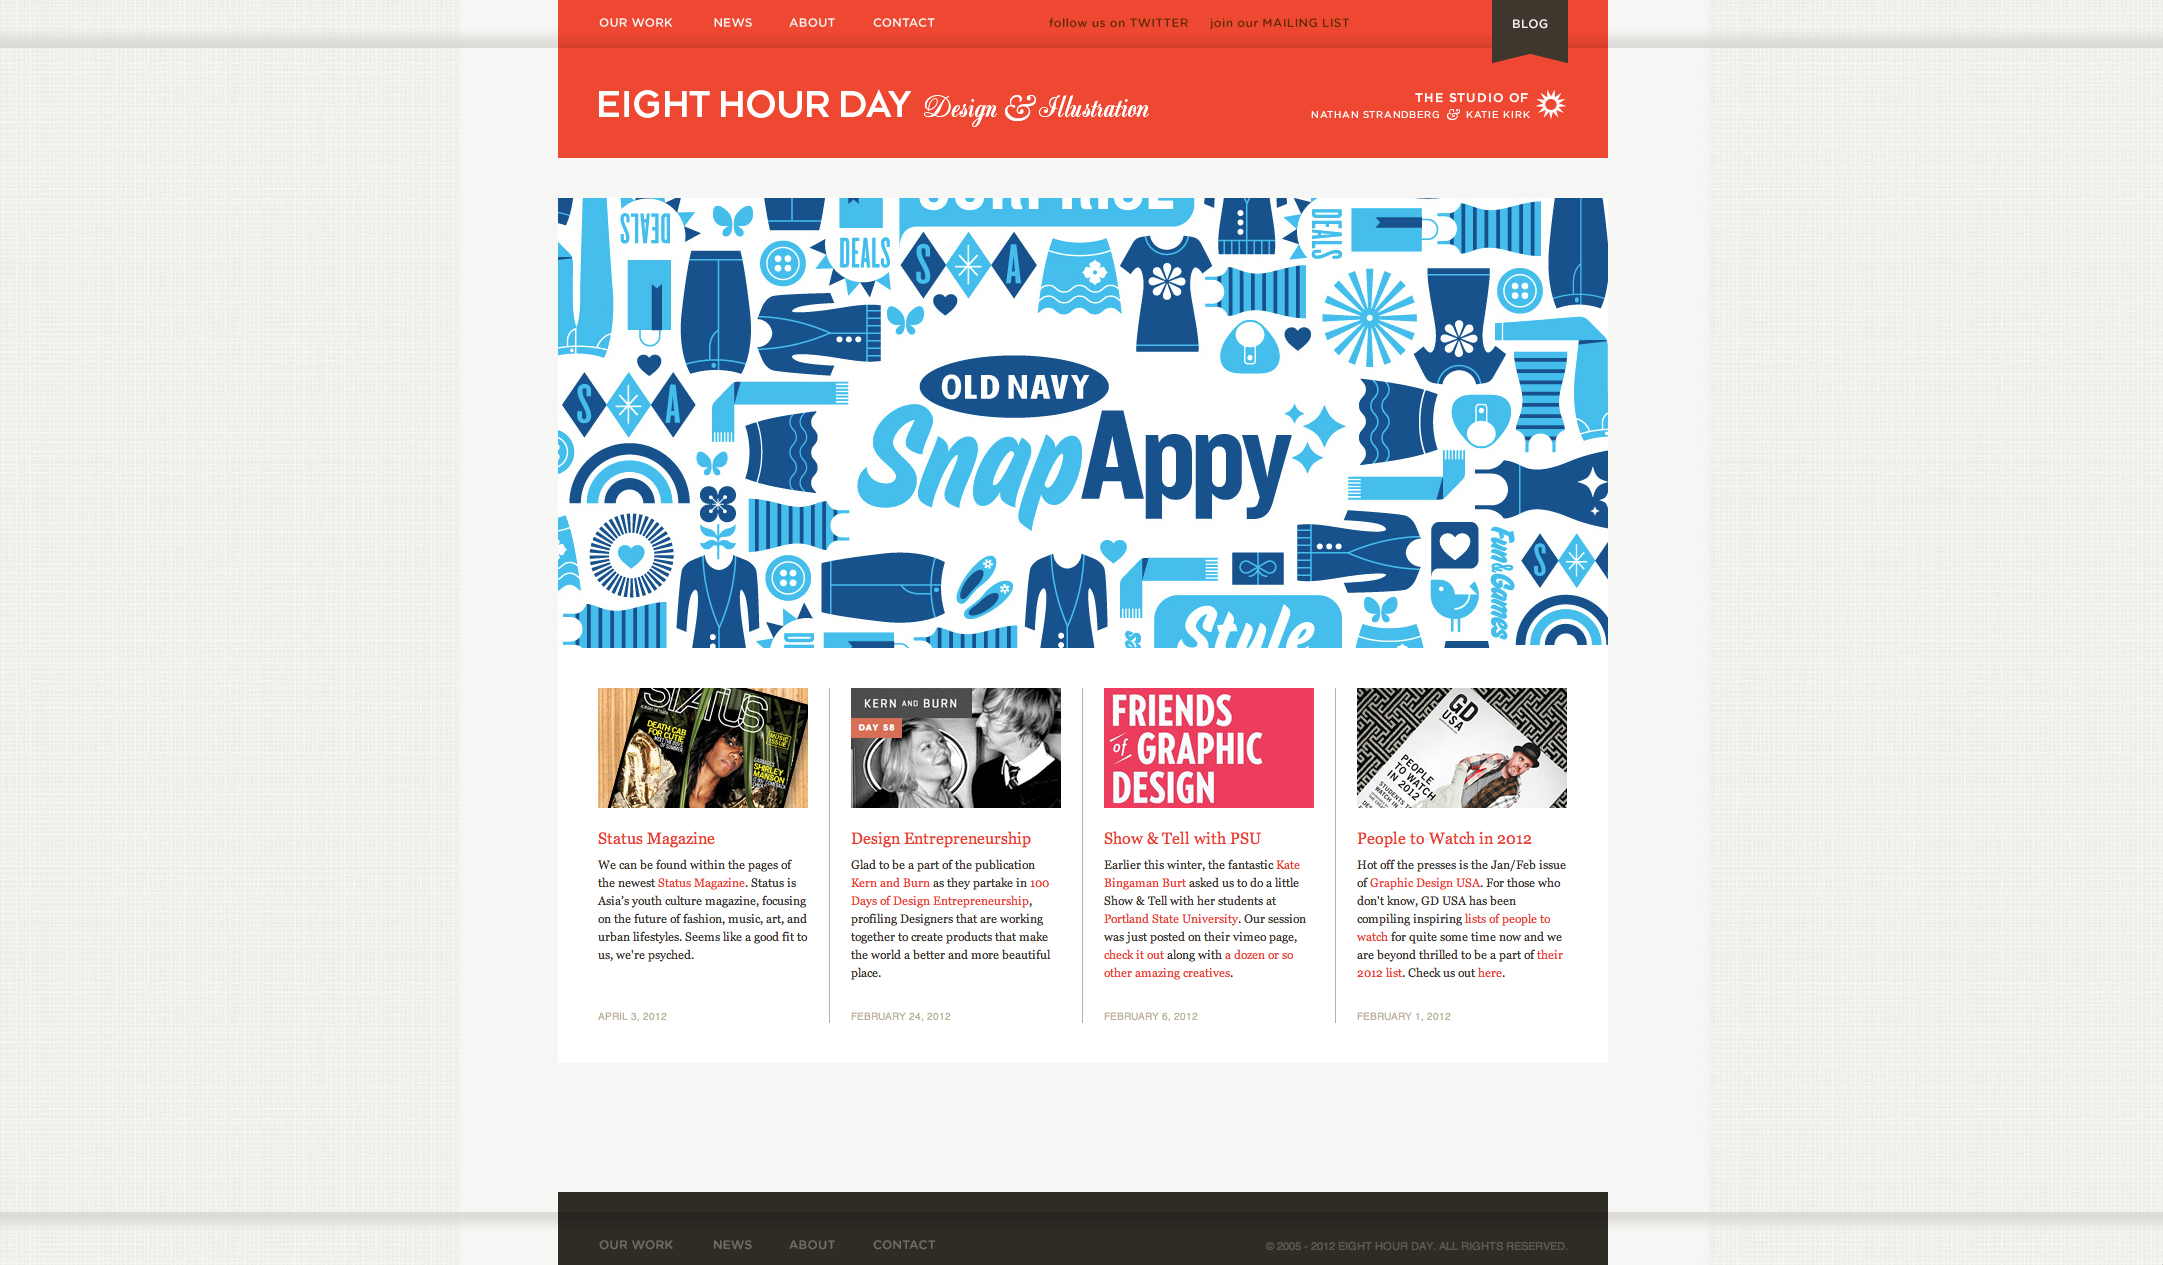
Eight Hour Day
This website is the best cake or baker shop I have seen in a while. I though it was very classy and showed the pastries off very well. I went to this website and it make me hungry which is perfect for this store.
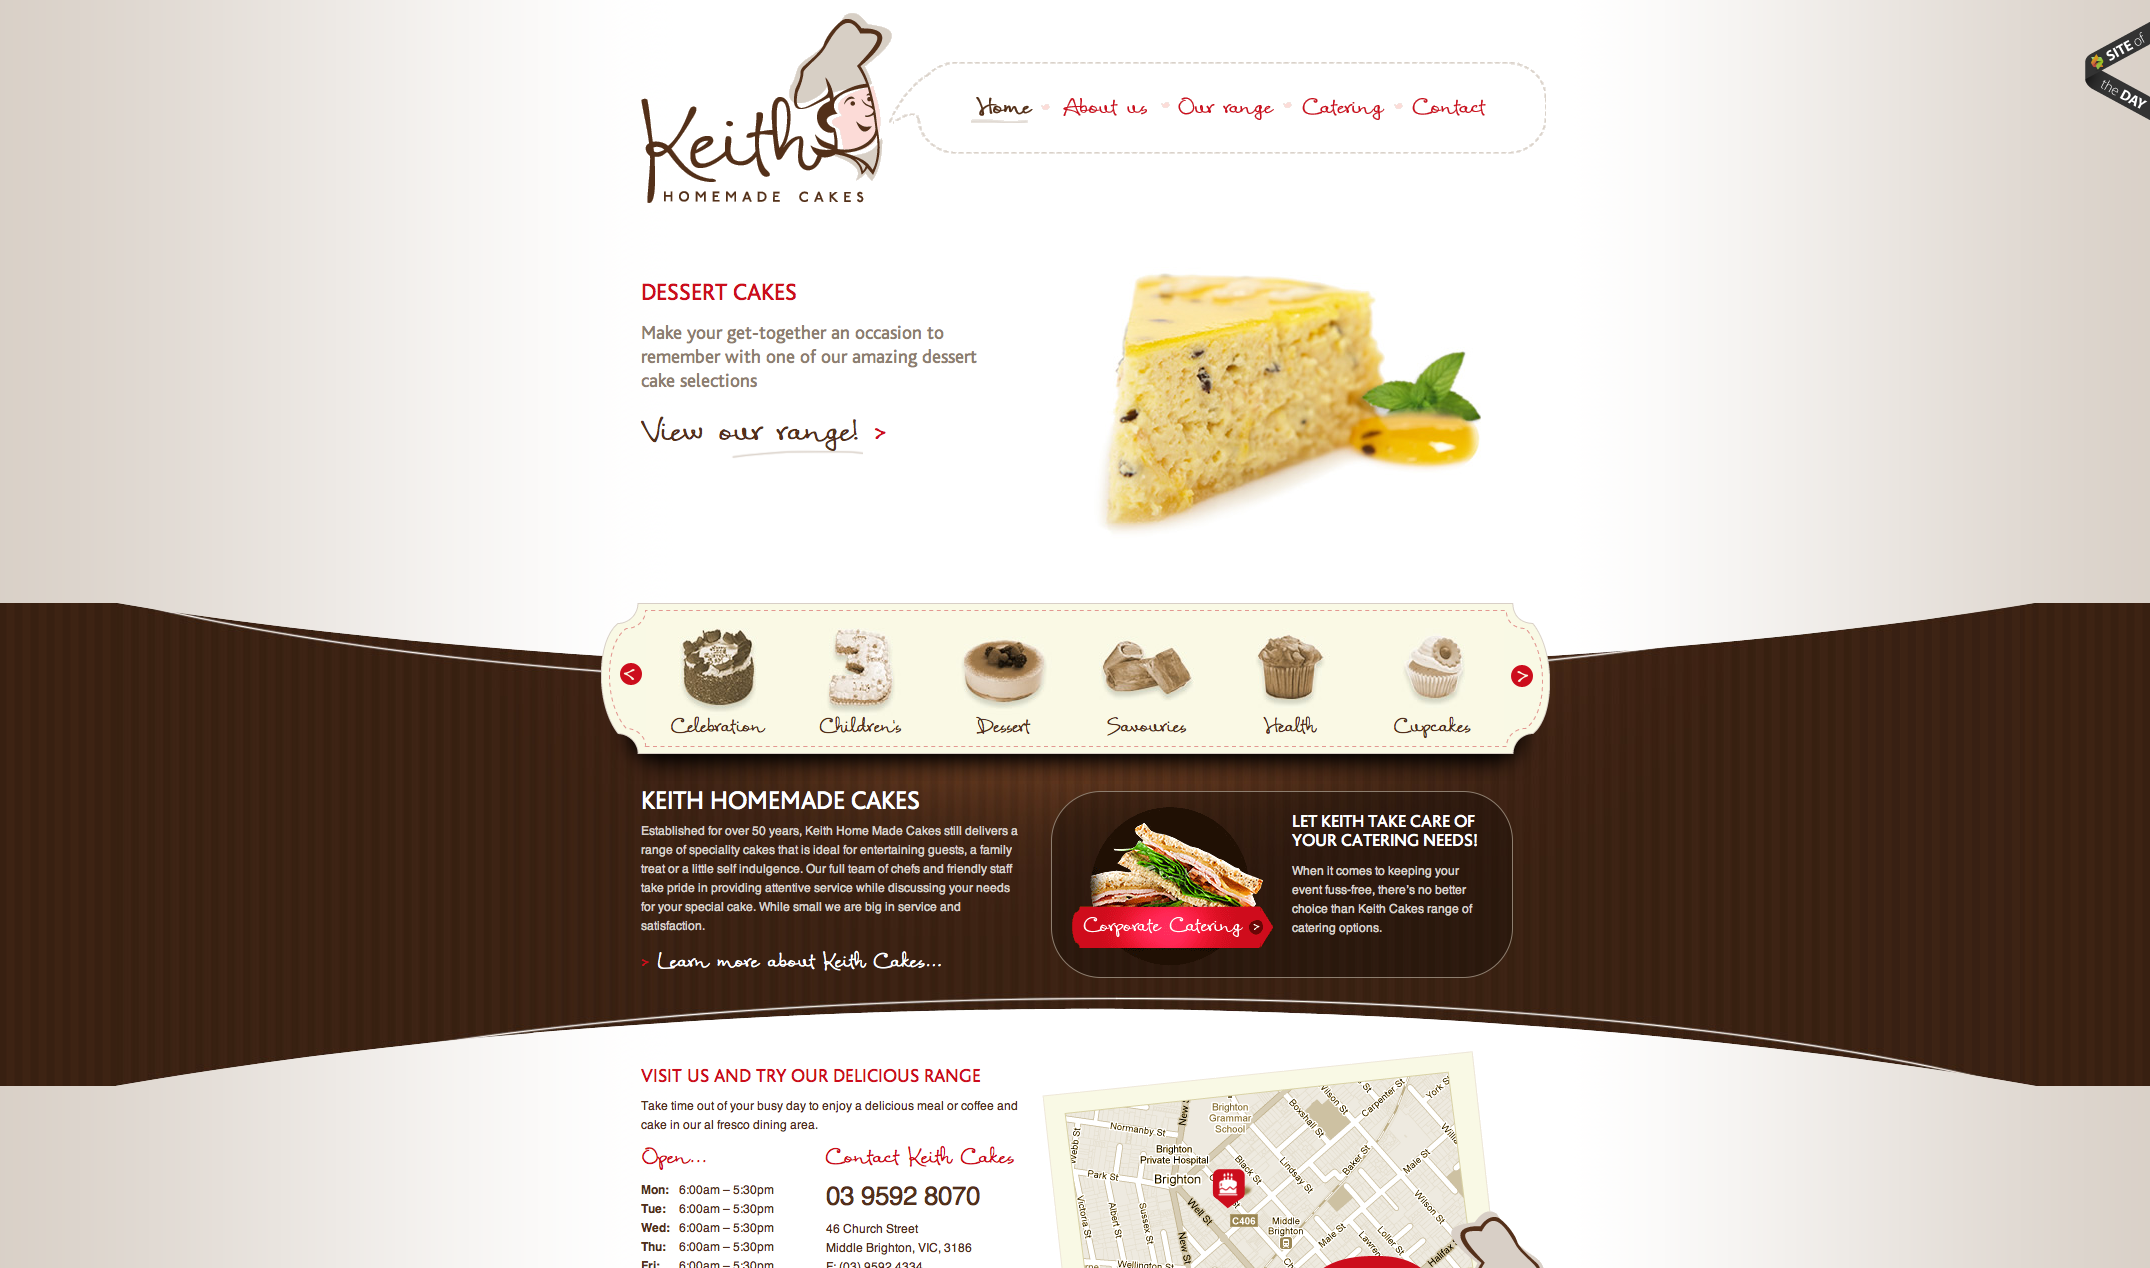
Keith Cakes

Houzz
Pinterest has received a lot of press lately. This site has some similarities, but it’s great if you are constructing a home or redesigning a room. You are able to collect image ideas. You can find out more about a product or buy. You may ask a question about the products or services also.

Houzz
Just showing an inner page and a hover option.

Nike skateboarding
I liked how the navigation list exploded when I scrolled over it.
Nice article by Josh Clark on .Net Magazine on the problem with building separate “desktop” and “mobile” websites.
First, a growing number of people are using mobile as the only way they access the web. A pair of studies late last year from Pew and from On Device Research showed that over 25 per cent of people in the US who browse the web on smartphones almost never use any other platform. That’s north of 11 per cent of adults in the US, or about 25 million people, who only see the web on small screens. There’s a digital-divide issue here. People who can afford only one screen or internet connection are choosing the phone. If you want to reach them at all, you have to reach them on mobile. We can’t settle for serving such a huge audience a stripped-down experience or force them to swim through a desktop layout in a small screen.
…
We’ve all had the experience of going to a website on our phones and getting bumped to the mobile version. It looks great except, wait a minute, they’ve removed the exact feature or piece of content that I’m looking for.
This is the problem responsive design is trying to solve. Read the whole thing.
Connecting to and retrieving data from a MySQL database, processing it with PHP, and outputting it to the page.
Exercise 14 Exercise 14 Solution View Solution
SELECT, UPDATE, INSERT, etc.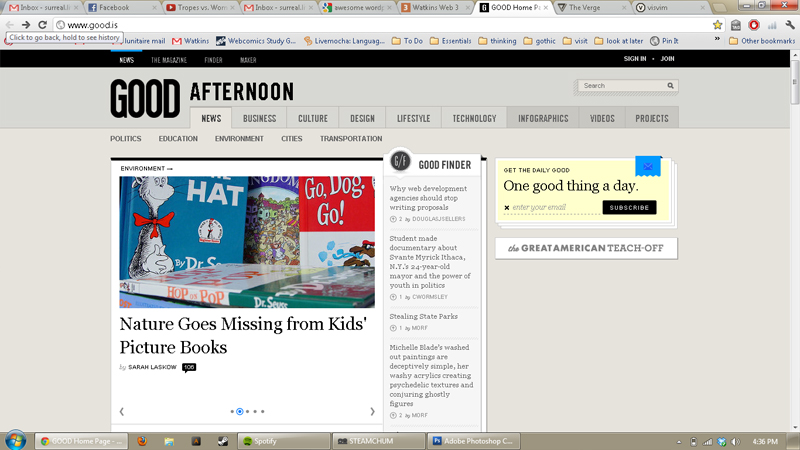
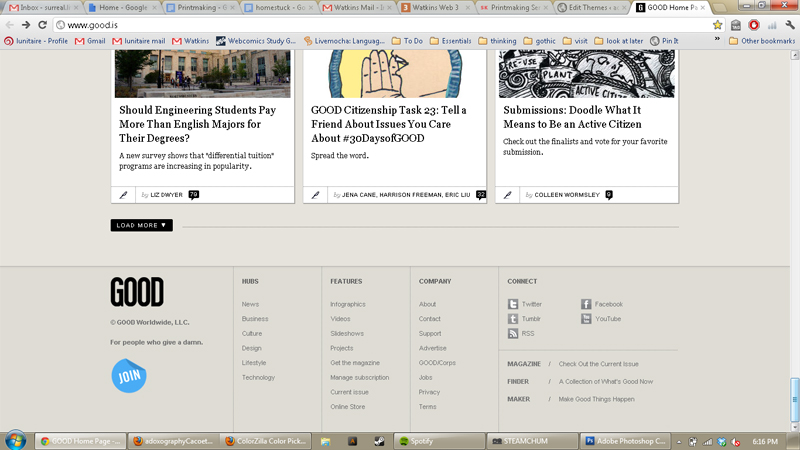
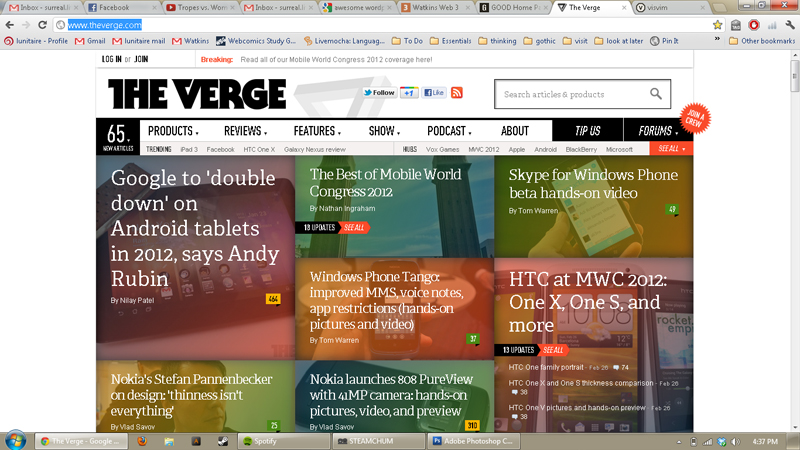
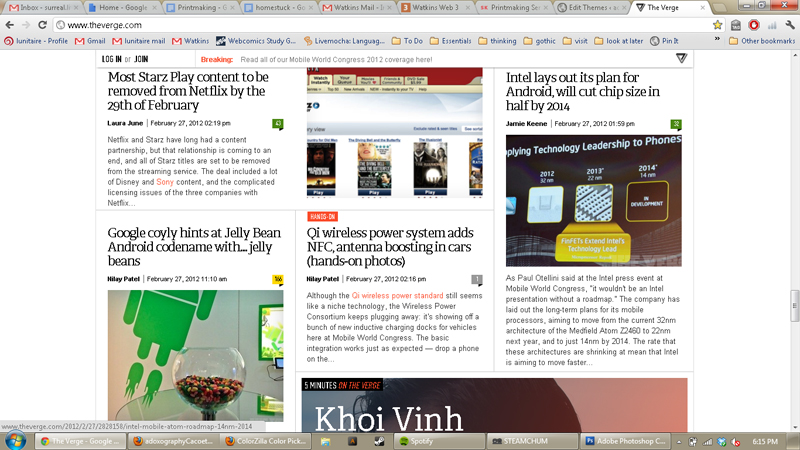
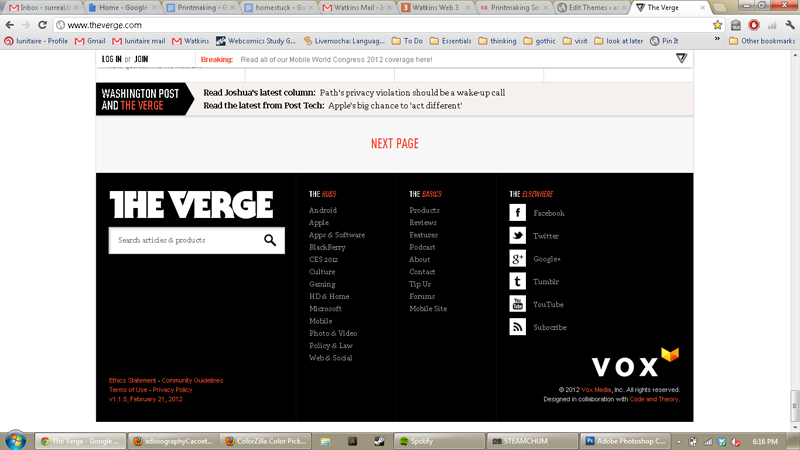
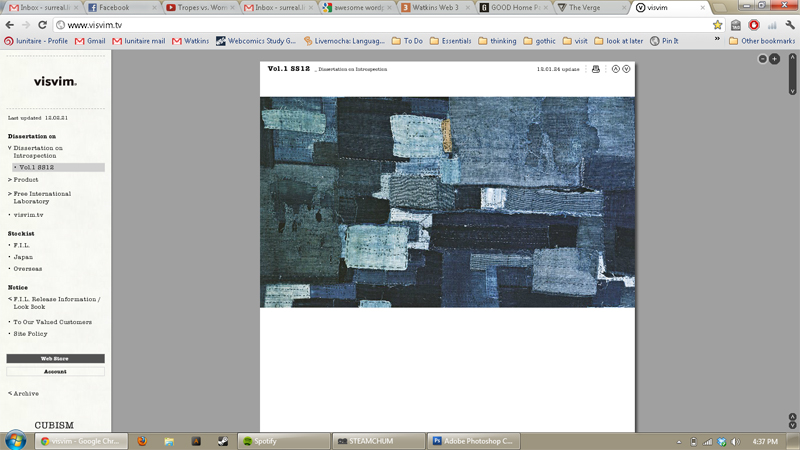
Thought I would post a link to the slides for the SEO talk. The lady that gave the talk is from Vanderbilt. She's been doing this pretty much since the web started. You don't get the talk, but the slides have lots of really great information on SEO.
Writing a paper for a class and need to know the word count? copy and paste your text in a word count tool.
Writing a paper and unsure about citing a web site or book, check out easybib, copy and paste your url for a correct citation.
Koalas To The Max is a website in which you can hover over dots to make smaller dots. Eventually they turn into an image.
A similar project to the one above. It just has a different image and thus different colored dots.
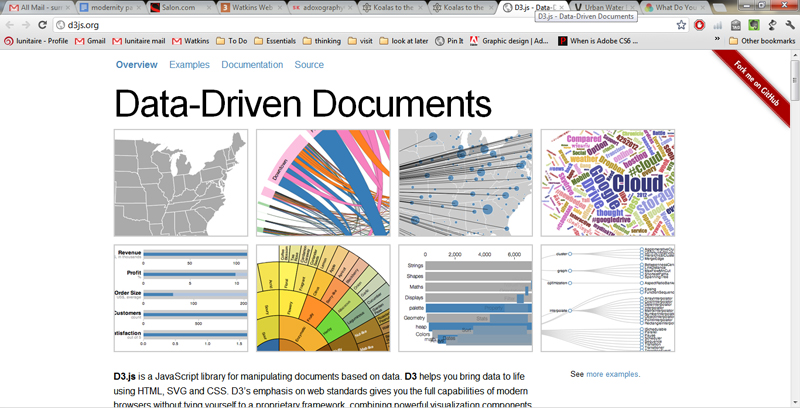
Data Driven Documents was used to make the websites above and the Urban Water Explorer too.
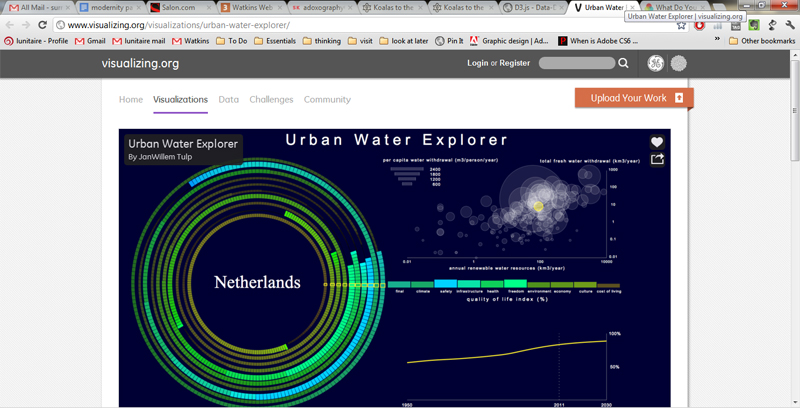
The Urban Water Explorer is pretty neat looking.
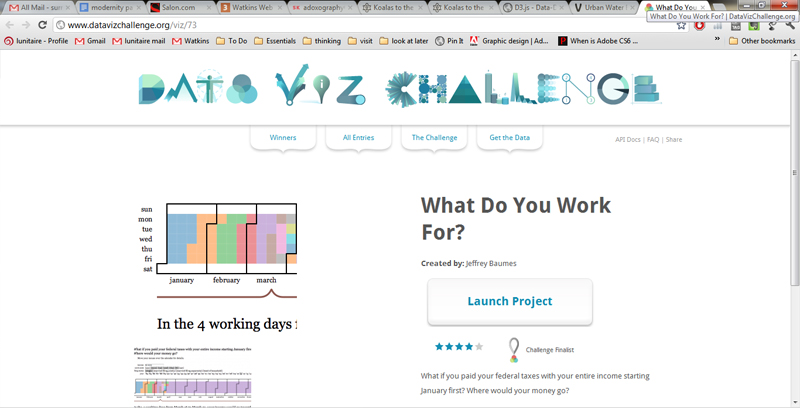
Data Viz Challenge was a visualization challenge using data in which some of the contestants used D3js from above. The entries are interesting.
Thank you all for a great semester! Your latest work is now linked from the projects page.
While I have no plans to take down this site, you can save its contents by clicking all posts and then (once it’s finished loading) print to PDF. If you want to grab all the exercises, view the exercises tag and hit all the download buttons.
I found this really interesting article of at NetTuts+ about some really useful CSS selectors we never got around to that can come in handy. The first are simple, but they get interesing when they get down to things like ul + li and ul ~ li. X[href="foo"] is a pretty interesting one too. Worth checking out if you're still interested in some very basic CSS web design techniques. If anyone is still checking the Web 3 site.
Here's the link
Mozilla is unleashing a new Firefox OS for mobile devices that runs completely on HTML5. Rather all the apps/software will basically be HTML5 web apps. This seems prettying exciting to me. A whole new world may be opening up if this takes off. Start brushing up and your skills and get in at the ground level. Opportunities galore!
Read More about Firefox's new mobile OS